Personalized Biscoff Sandwich Cookies for Jessica’s Virtual Bridal Shower

“Those who bring sunshine into the lives of others cannot keep it from themselves.”

One of my favorite quotes, from James Matthew Barrie, truly epitomizes my simply delightful friend Jessica, creator of the scrumptious blog, My Baking Heart. Years back when I first began Hot Oven, Warm Heart and joined the Sweet Melissa Sundays baking group, I had the pleasure of meeting and getting to know Jessica through our weekly correspondence. To this day, I remember how special she made me feel by leaving such thoughtful, kind, elevating comments which I always looked forward to receiving. Upon my return following an extended hiatus from blogging, Jessica reached out to me almost immediately with open arms and it absolutely meant the world. But that’s just Jessica. She’s warm and caring, good-natured and supportive. I’m so lucky to call her my friend, and am overwhelmed with excitement to celebrate her upcoming nuptials! That’s right, Jessica is getting married, and I was granted the opportunity to honor her in a very unique way- a virtual bridal shower.

Organized by the lovely Nikki of Pennies on a Platter, Jessica’s virtual bridal shower is a like an online party, where the guests are a select group of her blogging friends. On October 3rd, each of us will feature a post highlighting a dish that we would bring if everyone could actually get together in person. How neat, right? I was blown away that I was invited to contribute, so I RSVP’d right away, ready to join in on the fun and send best wishes to the bride-to-be!

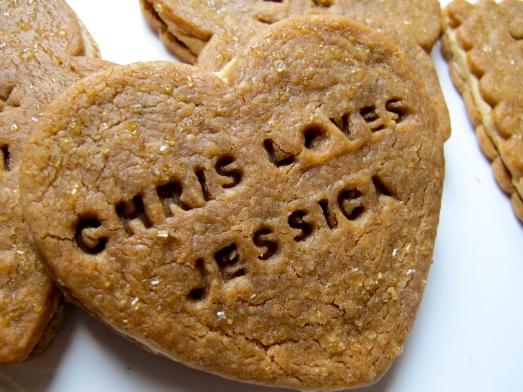
When it came to selecting my dish, I knew I wanted to bake something sweet, and I decided it was the perfect time to break out two items I was saving for just the right occasion: my Williams Sonoma “Message In A Cookie Cutter” set (a must have for any crazy cookie cutter collector like myself!) and a much coveted jar of Speculoos Cookie Butter Spread (aka Biscoff), which I actually had to go out of state to a Trader Joe’s in CT to get my hands on! I know I’m the last known blogger to gush over the dangerously delectable spread, but I just couldn’t resist jumping on the Biscoff bandwagon. Arguably the Nutella of the new decade, Biscoff can best be described as the ideal amalgamation of peanut butter (in consistency) and cinnamon sugar graham crackers (in flavor). Derived from the much-loved Belgian delicacy, the speculoos cookie, the spread actually has a very interesting back-story. Speculoos cookies are decorative caramelized biscuits traditionally used to celebrate weddings and births (how apropos), commemorate the name day of Saint Nicholas, teach history, and chronicle war in Europe, and they actually make up 20% of all the cookies eaten in Belgium. Already famous overseas, the cookies gained further acclaim when introduced as Biscoff (as in biscuits and coffee) by Lotus Bakeries to North American airline travelers and consumers. So how’d we get from the much-loved spicy crisp cookies to the renowned spread? That’s thanks to the brilliant idea of Els Scheppers, a culinary enthusiast and finalist on the Belgian prime time TV show “De Bedenkers” (The Inventors), who developed a recipe for a creamy spread with the unique taste of the Lotus Speculoos cookies. While she didn’t officially win, she did team up with Lotus to manufacture her creation, and the rest is history. Now Europeans and Americans alike can savor their cookies by the spoonful!

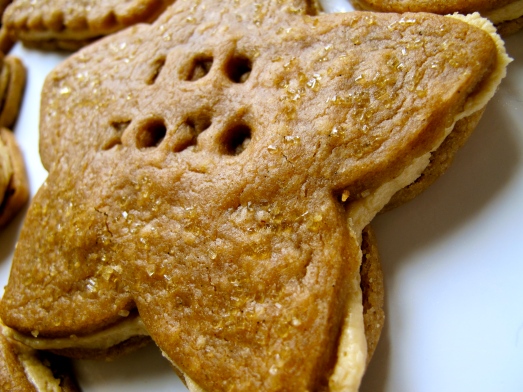
I found a great recipe for homemade Biscoff cookie sandwiches that featured the spread in a luscious, sweet and spicy cream cheese filling. The results were a smashing success: two tender, melt in your mouth, crisp on the outside yet slightly chewy on the inside cookies encasing a light and fluffy, flavor packed buttercream that highlights the best attributes of the silky smooth spread. If you happen to get your hands on a jar, these are a must try!

Homemade Biscoff Sandwich Cookies with Biscoff Cream Cheese Frosting

recipe slightly adapted from Creative Culinary

Ingredients

For the Cookies:

  • 2 cups all purpose flour
  • 1 Tbsp cinnamon
  • 1/4 tsp freshly ground nutmeg
  • 1/4 tsp ground ginger
  • *I also added 1/8 tsp cloves
  • 1/2 tsp salt
  • 1/2 tsp baking soda
  • 1 cup (2 sticks) unsalted butter, softened
  • 1/2 cup sugar
  • 1/4 cup firmly packed dark brown sugar
  • 1 tsp pure vanilla extract (*I subbed an equal amount of vanilla bean paste- with which I am officially obsessed!)
For the Frosting: (*I found a half batch more than adequate for my cookies, but it’s so delicious, I highly advise making the recipe in full. Oh, the endless possibilities for the leftovers!)

  • 10 ounces cream cheese, at room temperature
  • 1 stick (4 ounces) unsalted butter, at room temperature
  • 5 cups confectioners’ sugar, whisked to lighten
  • 2/3 cup Biscoff spread

Preparation

To Make the Cookies:
  1. In a medium bowl add the flour, cinnamon, nutmeg, ginger, salt, and baking soda together. Whisk together thoroughly to combine and aerate. Set aside.
  2. In a large bowl or the bowl of a stand mixer, cream the butter together with the sugar and brown sugar until light and fluffy. Add the vanilla extract and mix again.
  3. With the mixer on slow, add the flour mixture a little bit at a time until the dough is fully combined. Make sure to scrape the sides of the bowl often.
  4. Refrigerate the dough for at least half an hour.
  5. When the dough is thoroughly chilled, preheat the oven to 350F.
  6. Lightly flour a large surface and roll out the dough to 1/4″ thick as best you can. Using a small biscuit or cookie cutter of your preference, cut as many cookies as you can out of the rolled out dough.
  7. Combine the leftover dough into a ball again, and roll out again. Only do this once, as reworking the dough too many times will result in tough cookies.
  8. Bake cookies for roughly 9-10 minutes. Watch the oven very closely after the 7 minute mark. Because of the thinness and high sugar content, the cookies are a lot like caramel and can go from perfect to burnt in a flash.
  9. Allow to cool. Enjoy as is or make this Biscoff sandwich cookie using the following icing recipe.
To Make the Frosting:
  1. In a large bowl with an electric mixer, beat the cream cheese and butter until light and fluffy.
  2. Gradually add the confectioners’ sugar 1 cup at a time, mixing thoroughly after each addition and scraping down the sides of the bowl often. Continue to beat on medium speed until light and fluffy, 3 to 4 minutes.
  3. Add the Biscoff spread and beat until thoroughly blended.
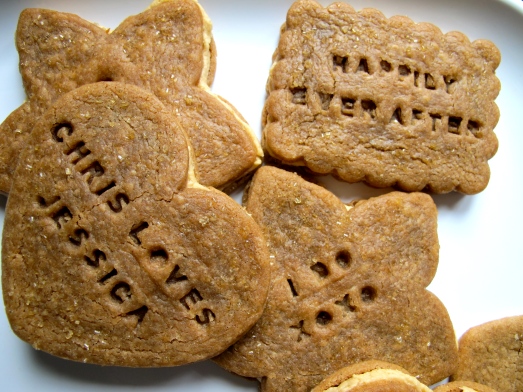
A big thank you to both Nikki and Jessica for including me in this special event. Don’t forget to stop by Pennies on a Platter to see the round-up of all the guests’ dishes, and of course, check out My Baking Heart, where you’re always in for a real treat! Congratulations Jessica, I’m wishing you and Chris an extraordinary wedding day and a beautiful future together.


Flourless Triple Chocolate Torte

In Yiddish, the word simcha is defined as joy or happiness, but it more commonly refers to a festive occasion, as a celebration marks life’s happiest special events. While I love to bake for my family and friends any day of the week, it is a true honor for me to contribute a baked good that will help commemorate a significant moment in their lives. So when my sister called and asked for a dessert to be served at her friend Lindsay’s baby shower, I jumped at the chance to help. I think I may have jumped too soon, though, as her next sentence included the phrase gluten-free. More specifically, gluten-free cupcakes- I’ve got another Yiddish phrase you may have heard that was befitting this situation- Oy Vey! Okay… a minor hiccup as I’ve never attempted any gluten-free baking before. But I was confident I could make it work. I’d simply do my research, as per usual, land on a reliable recipe, and do the best I could. Oh, wait, there was one other little detail I failed to consider… I was without a kitchen. We had just started a gut renovation, and I no longer had a sink, stove-top, oven, etc. to accommodate any baking at all. Luckily, what I did have is an extremely generous Aunt living nearby, who graciously opened her home and lent me her fabulous kitchen for this project. (Thank you so very much, Aunt Maggie!) With more solutions than problems on the horizon, I felt ready to tackle the challenge.

After reading lots of reviews, I discovered a very informative book dedicated solely to gluten-free cupcakes with plenty of recipes to choose from: Artisanal Gluten-Free Cupcakes by Kelli and Peter Bronski. I settled on the classic chocolate cupcakes, which I figured I could dress up with a white chocolate mousse filling and fudge frosting like my traditional Triple Chocolate Cupcakes. Yet as bake day drew closer, my self-assurance waned, and I convinced myself I’d never pull it off successfully. Usually in this situation I would do a trial run beforehand, but I certainly wasn’t going to inconvenience my Aunt any further just for taste testing purposes and to put my mind at ease. Then, a light bulb moment- why futz with a slew of unfamiliar ingredients and drive myself crazy worrying about sub par cupcakes, when I could simply select a naturally gluten-free recipe more likely to produce delicious results? I was scared of disappointing my sister, but when I threw the idea of a flourless chocolate cake her way, she gave me the green light without hesitation, and thus I was off in an entirely different direction.

This recipe from King Arthur sort of fell in my lap, and offered both ease of preparation and simplicity of ingredients. The best part? It didn’t require xantham gum. Dense and extremely rich, flourless chocolate cakes (or tortes) pack a punch of chocolate flavor in every bite and have a soft, almost mousse-like texture. Most contain ingredients found in every baker’s pantry: unsalted butter for richness, eggs for lift (as there is no other leavening), chocolate and sugar. My recipe also included cocoa powder; depending on the brand, cocoa is about 60% starch, which provides body, structure, and chewiness that would otherwise be missing in the absence of flour. It also called for two chocolate flavor boosters, coffee (in the form of espresso powder) and vanilla (I used my latest obsession, vanilla bean paste). Instead of having to whip the egg whites and yolks separately, my recipe added them whole, eliminating extra steps. And even better, it offered an actual internal temperature to test the cake’s doneness. I must admit, I always hate that part- deciphering if something is done baking or needs another few minutes. I love when my instant read thermometer eliminates the guessing game. While I’m not sure why the magical temperature was 200 degrees, I did learn that the proteins in the eggs coagulate at 165, creating added structure for the cake. After pulling the cake out and letting it cool, I was able to refrigerate it overnight before adding the finishing touches.

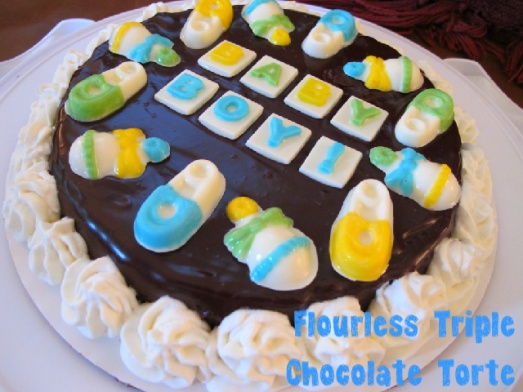
Another bonus- baking the day before the event was actually desirable as the texture became even more smooth and fudgy. The “icing on the cake” was the chocolate ganache poured over the entire torte, hiding any and all imperfections, and providing a final glossy coat of pure chocolatey goodness. While still wet, I attached the baby themed, hand painted chocolate decorations I made in advance, and at the last minute, piped the lightly sweetened whipped cream rosettes. (I was worried that the whipped cream wouldn’t hold up through the trip, but my friend Steph offered highly useful advice to ensure it would; add some powdered sugar, which contains cornstarch, to stabilize the cream. Worked like a charm!) It was then ready to make its debut at the celebration.

My sister returned home with glowing reviews to report, and I couldn’t be more pleased. Most importantly, the guest of honor was extremely moved by her friends’ thoughtfulness (I found out right before that the shower was a surprise), and I hope my cake made it all the more special. Congratulations Lindsay, and best of luck with the arrival of your new bundle of joy!

Note: Because there are so few ingredients in this cake, their quality is of the utmost importance. Obviously, the chocolate is the star here: I used a mixture of Guittard and Ghriadelli baking chips along with Valrhona cocoa (swoon), and even though I never tasted this beauty, I can honestly say the intoxicating aroma emanating from the oven while it was baking was the embodiment of pure, unadulterated chocolate. Everyone in the room had to restrain themselves from grabbing a fork and digging in, and my Mom was eagerly gathering the fallen crumbs.

Flourless Triple Chocolate Torte

Recipe by http://www.kingarthurflour.com

Yield: 8″ cake, 8 to 12 servings

Ingredients:

  • 1 cup/6 ounces semisweet or bittersweet chocolate chips
  • 1/2 cup (8 tablespoons)/4 ounces unsalted butter
  • 3/4 cup/5 1/4 ounces granulated sugar
  • 1/4 teaspoon salt
  • 1 to 2 teaspoons espresso powder, optional
  • 1 teaspoon vanilla extract
  • 3 large eggs
  • 1/2 cup/1 1/2 ounces unsweetened cocoa powder, Dutch-process preferred
  • 1 cup/6 ounces semisweet or bittersweet chocolate chips
  • 1/2 cup/2 ounces heavy cream

Directions:

  1. Preheat the oven to 375 degrees F. Lightly grease an 8″ round cake pan; cut a piece of parchment or waxed paper to fit, grease it, and lay it in the bottom of the pan.
  2. To make the cake: Put the chocolate and butter in a microwave-safe bowl, and heat until the butter is melted and the chips are soft. Stir until the chips melt, reheating briefly if necessary. You can also do this over a burner set at very low heat. Transfer the melted chocolate/butter to a mixing bowl.
  3. Stir in the sugar, salt, espresso powder, and vanilla. Espresso enhances chocolate’s flavor much as vanilla does; using 1 teaspoon will simply enhance the flavor, while 2 teaspoons will lend a hint of mocha to the cake.
  4. Add the eggs, beating briefly until smooth. Add the cocoa powder, and mix just to combine. (Next time, I’ll sift the cocoa powder into the mixture to avoid having lumps in the batter).
  5. Spoon the batter into the prepared pan.
  6. Bake the cake for 25 minutes; the top will have formed a thin crust, and it should register at least 200 degrees F on an instant-read thermometer inserted into its center. (Start checking a few minutes early, mine was done at 23 minutes).
  7. Remove it from the oven, and cool it in the pan for 5 minutes.
  8. Loosen the edges of the pan with a table knife or nylon spreader, and turn it out onto a serving plate. The top will now be on the bottom; that’s fine. Also, the edges will crumble a bit, which is also fine. Allow the cake to cool completely before glazing.
  9. To make the glaze: Combine the chocolate and cream in a microwave-safe bowl, and heat until the cream is very hot, but not simmering. Remove from the microwave, and stir until the chocolate melts and the mixture is completely smooth.
  10. Spoon the glaze over the cake, spreading it to drip over the sides a bit. Allow the glaze to set for several hours before serving the cake.
  11. Note: I used a combination of 2/3 cup/4 ounces bittersweet and 1/3 cup/2 ounces semisweet chocolate in the cake and the opposite proportions in the glaze.

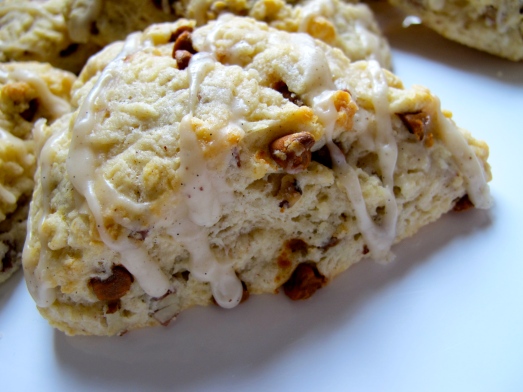
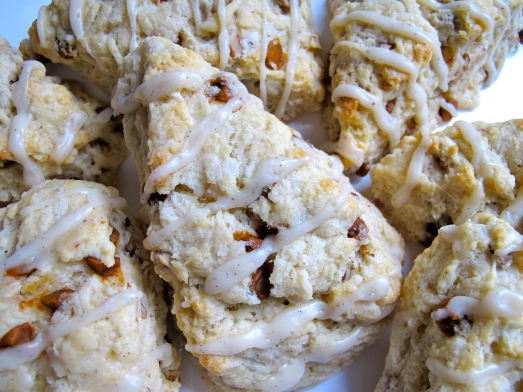
ABC: Cinnamon Chip Pecan Scones with Brown-Butter Vanilla Bean Glaze

Arguably one of the best perks of blogging is the ability to connect with others who share a similar passion, and form genuine friendships in the process. I am so thankful that I met highly talented, especially thoughtful and caring blogger, Hanaâ of “Hanaâ’s Kitchen,” who has not only taught me a great deal about baking, but has also been a strong support along the way. I am so excited to be joining a fantastic group she began called the Avid Baker’s Challenge. Currently baking out of The Weekend Baker by Abigail Dodge, the avid bakers make a selected recipe together each month and then share their results. For May, our project was scones, with the flavor profile baker’s choice. Oh, the possibilities! Seriously, I played around with different combinations for the majority of the month of April. Does your mind ever wander to ponder the potential taste of a soon-to-be-made baked good, or is it just me?

Originating in Scotland, the first scones were made with oats, shaped into a large round, scored into four or six wedges (triangles) and griddle-baked over an open fire (later, a stovetop) like a thick pancake. With the advent of baking soda in Victorian times, scones were baked and transformed into customizable teatime accompaniments. With strong historical ties to England as well, scones are steeped in British tradition, and are a distant relative of the crumpet and English muffin. Unfortunately, they are often known to be dry as a bone, tasteless, and only made palatable by the addition of plenty butter, clotted cream, jam, or lemon curd. Their modern American counterpart, a quick bread closely related to biscuits, reflects our taste for rich, sweet breakfast pastries. Through the years, scones became coffee shop regulars, usually over-sized, misshapen muffin or cake-like objects, far removed from their British ancestors.

Since the last time I made a batch, I read about a variety of techniques aimed at creating the ultimate light and flakey scone, avoiding heavy, leaden variations at all costs. One method focuses on incorporating the butter, as lofty pastry depends on distinct pieces of butter distributed throughout the dough that melt during baking, allowing steam to escape and leaving pockets of air behind. To achieve this, the butter must be as cold and solid as possible until baking. The problem with traditional methods of cutting butter into flour, either with your fingers or a food processor, is that the butter becomes too warm during the process. A number of sources. including Cooks Illustrated and one of my favorite cookbooks, A Passion for Baking by Marcy Goldman, point to a fresh idea- freezing the butter and grating it on the large holes of a box grater before quickly and evenly cutting it into the flour. This succeeds at keeping the butter cold, and the the interior of the resulting scone tender and moist without being overly dense. I couldn’t wait to try such a novel concept, and this baking assignment seemed like the perfect opportunity.

I also called upon numerous other tips I found through research in my quest to achieve my best ever scones:

  • Just as the lightest bread is produced from the wettest dough, scone dough should be quite soft- resist the temptation to work more than 1-2 tablespoons of additional flour into the dough, just enough to facilitate handling.
  • Don’t overmix! In fact, work it as lightly and minimally as possible. Never knead the dough (beyond bringing it together) to avoid activating the gluten in the flour any more than necessary.
  • When shaping, either form a round and cut into wedges, or use a biscuit cutter, however, don’t twist it when you push down. It will seal the edges of the dough and prevent the scone from rising as high as possible.
  • If you use an egg wash or dairy glaze on top of your unbaked, cut scones, try not to let it drip down the sides. This also inhibits the rise.
  • Before a trip through the oven, chill scones for about 15 minutes in the freezer or an hour in the fridge- ensure the pieces of butter throughout are as cold and solid as possible.
  • Add ½ cup of water to a pan and place on the lower rack of the oven 10 minutes before you bake the scones- this will create a steamy environment that will assist with the rise. Also, bake scones in the upper third of the oven.
  • Don’t overbake or the resulting scones will be dry and crumbly. Look for bottoms that are golden brown and tops that are set but only lightly golden.
  • You can freeze scones before baking and pull them out as needed- simply shape, cover with plastic wrap and freeze until solid, about an hour. Bag airtight and return to the freezer. When you’re ready to bake, there’s no need to thaw them; just place frozen scones on a pan, and bake as directed, giving them about 5 additional minutes.
  • Although scones are best eaten straight from the oven, and certainly the day they’re made, leftover baked scones can be frozen too. When you want to serve, the author recommends that you thaw and reheat them in a skillet or griddle, covered with foil or a lid, heating on low to medium-low until warmed through.

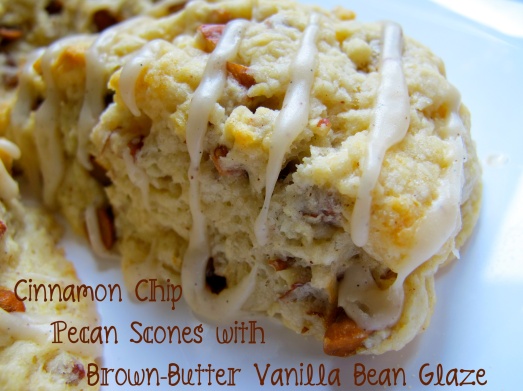
So did my batch benefit from all the tips and tricks I found? Well, their crisp outer crust gave way to a light, fluffy, moist interior packed with layer upon layer of flakey goodness. A slight tang from the buttermilk paired beautifully with the warmth of the spicy cinnamon and toasty pecans, and was foiled by the sweet nuttiness of the brown-butter vanilla bean glaze. Tender and buttery, these scones made my inspiration (a scone often ordered by my Mom along with her latte) a distant memory. Let’s just say they were my first ABC success, and I can’t wait to explore all the recipes to come. Don’t forget to check out what all the other bakers’ made this month, and grab a copy of The Weekend Baker. Thanks again Hanaâ for including me and making me feel so welcome 🙂

Note: To recreate my flavor profile- add 1/4 tsp cinnamon to the dry ingredients, and stir in 2 oz cinnamon chips and 1 1/2 oz chopped toasted pecans (about 3/4 c add-ins total). While the scones are baking, make a half-batch of this glaze, using an equal amount of vanilla bean paste (one of my FAVORITE ingredients… I love those magical little black dots!) instead of vanilla extract. Drizzle over the cooling scones and Viola!

Coming Back and Bloggers Bake For Hope 2012

Hi there.

Remember me?

Bubbly baking blogger from Boston passionate about serving scrumptious sweets to her family and friends? Sound familiar?

Well, I have most certainly not forgotten you. On the contrary, you’ve been on my mind and in my heart all this time- it’s been deeply distressing to be separated from all the phenomenal people who used to visit my site, as well as my fellow blogging buddies and baking groups. While it’s been more difficult than you can imagine for me to jump back in the mix, my very special role as a contributing member to the baking blogosphere is simply too important to abandon forever. It is an honor and a privilege to share my kitchen conquests with you, and I treasure the unique opportunity to connect with other talented and enthusiastic cooks and bakers from literally all over the world. Thankfully, I’ve come to know you lot as an extremely understanding and supportive group of folks, who welcome my participation with open arms whenever possible. Looking forward, I plan to partake in some new and exciting endeavors, including joining the Avid Bakers Challenge, an amazing assemblage of bakers led by my dear friend Hanaâ of “Hanaâ’s Kitchen,” who tackle the same recipe together each month. In the immediate future, I have the privilege of utilizing my baking to contribute to a great cause, Bloggers Bake For Hope 2012. When I discovered this exceptional effort to raise funds for the Avon Foundation, I just knew it was time to return to “Hot Oven, Warm Heart,” and in some small way, draw upon my baking for good.

Organized by two highly generous bloggers, Jen of “Beantown Baker” and Fiona of “A Boston Food Diary,” Bloggers Bake for Hope is an online virtual bake-sale event, with all proceeds benefiting the Avon Foundation. Participating bloggers will provide information about their baked goods, and each item will get its own blog post, which can be found here, when the bake sale opens on Monday, April 30th. If you would like to place a bid, leave a comment on the appropriate page with the dollar amount (All bidding will start at $15). Bidding will close on Wednesday, May 2nd, with the highest bidder being awarded the item. They will be notified via email during the weekend of May 5th, at which point they can return to the homepage, and pay via Paypal by clicking on the button reading “donate.” Once the donation has been made, the winner’s address will be sent to the baker, who will ship the baked goods sometime during the month of May. It’s really much simpler than it sounds, I promise!

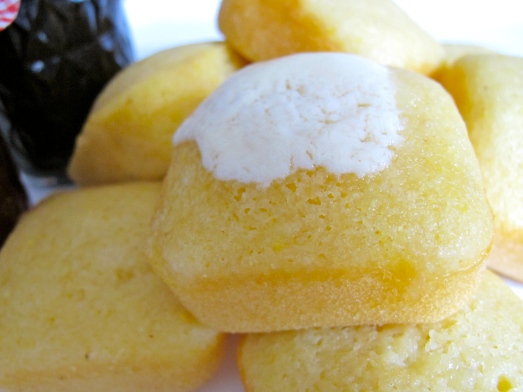
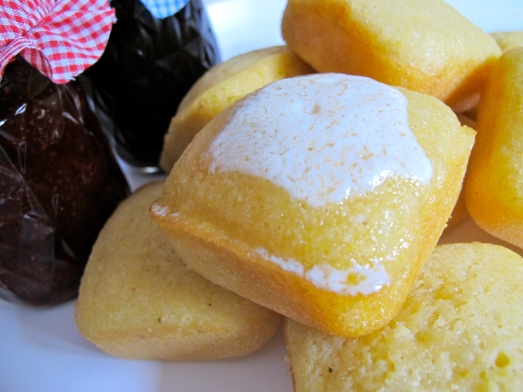
When selecting my submission, I drew upon my greatest inspiration, both in life and the kitchen, my beloved Grammy. She cooked her way into countless hearts over the years, serving up mouth-watering meals and special memories that will stay with those she touched forever. My best friend, and my hero, Grammy and I shared a sincere passion for preparing food and serving others that goes beyond words. Along with innumerable other life lessons that have shaped me into the woman I am today, she taught me what it means to translate love to the plate. As my passion for baking grew, her support was inimitable and I could see the pride she felt shining deeply in her eyes. Of the many treats I had the pleasure of making for her, these simple corn muffins, always served alongside my homemade jam, made her light up in a way I can’t describe. It was as if she couldn’t believe her granddaughter had possibly baked something so delicious. I never understood what was so special about these muffins, but I certainly understood how special she made me feel when she ate one.

I hope the recipient of my package, complete with Grammy’s favorite corn muffins and jam, knows just how much I appreciate their support, and that tucked inside they just might find a little bit of love I was sure not to forget.

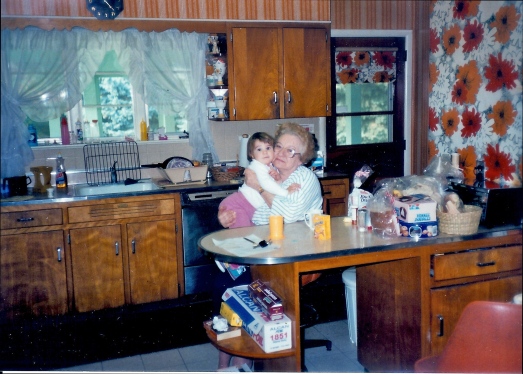
Me and Grammy in her kitchen, 1989

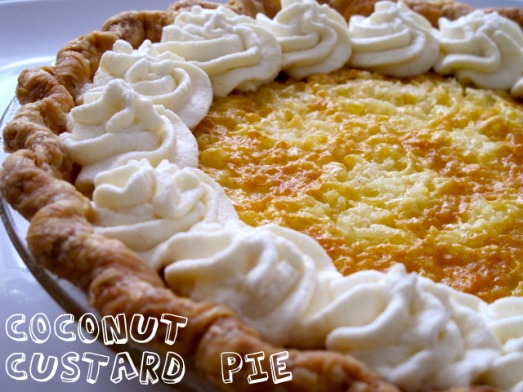
SMS: Coconut Custard Pie

Anxious anticipation does not begin to describe the build up of emotion brought on by this pie. After noticing it pop up as an upcoming SMS recipe, I began contemplating the perfect opportunity to present it to my Mom, a woman who’s undeniably cuckoo for coconut. As a May recipe, the timing seemed meant to be- Mother’s Day was just around the corner, and I thought it would definitely win me some daughterly brownie points if served as her celebratory dessert. I even considered making individual tartlets to give it some additional panache (I’ve been dying to break in my new pans!), but at the last minute chickened out, fearing that without specific directions on the bake time, I might not be able to accurately assess when they were done. For the best mom in the whole world, it had to be perfect, and neither soupy, curdled, or over-baked custard would do.

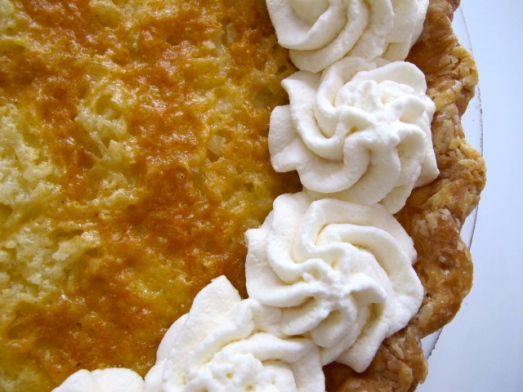
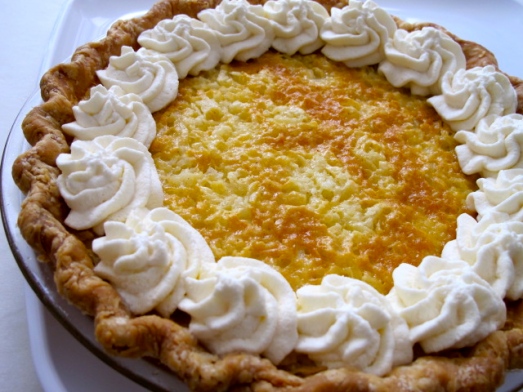
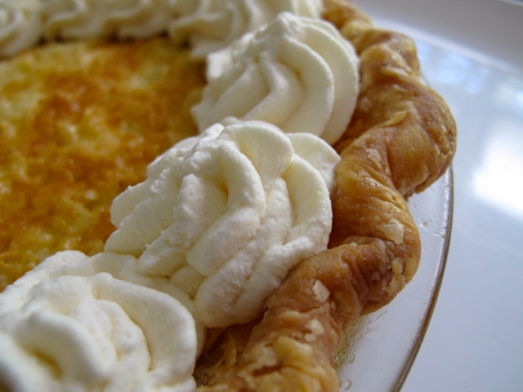
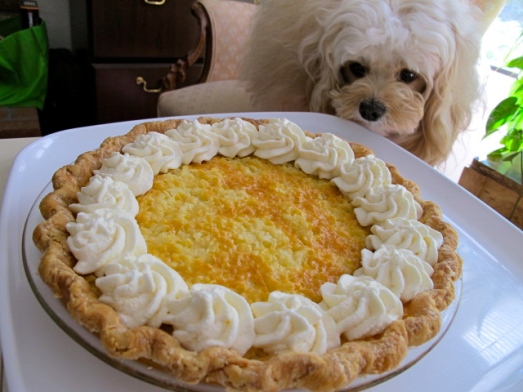
I got as far as halfway through crimping before my energy faded away, and sadly came to the conclusion this pie would not reach completion in time for the holiday. Fortunately, I am blessed to have the most understanding, compassionate, encouraging mom on the planet, and sensing I was heartbroken with disappointment, she immediately put my mind at ease, offering to delay festivities for her special day until I was feeling better. A few weeks went by with my unbaked pie crust chilling out in the freezer, yet she waited patiently, without a single complaint, until finally the day arrived when the pie emerged from the oven, everything I had imagined and more: golden brown and bubbly with coconut glistening, filling our home with an aroma reminiscent of an island breeze. After it cooled, was garnished with some fresh whipped cream rosettes, sliced and plated, my Mom could finally take that first bite she’d been longing for since my first mention of the recipe… without hesitation she released a deep and enthusiastic sigh, an ear-to-ear grin plastered on her face. I guess it was all she imagined and more too. In that moment, witnessing her priceless reaction, I think we both felt like the recipients of a very special gift.

When I first read this recipe’s title, I was intrigued and curious about the distinction between a Coconut Custard Pie and a Coconut Cream Pie (something I was more familiar with). I thought it might just be a different name (maybe Melissa wanted it to sound fancy and refined, who knows?) It turns out that although they contain like ingredients, they are not in fact one and the same. A “custard pie” is any type of uncooked custard mixture (commonly composed of milk, eggs, sugar, salt, vanilla extract and sometimes nutmeg) added to an uncooked or partially cooked crust and baked together. Cheesecake, pumpkin pie, lemon meringue, and pecan pie all fall under this category. Alternatively, a “cream pie” is a pie that contains cooked custard poured into a cooled, (fully) precooked crust. After clearing that up, I made sure to alert my Mom, so she wouldn’t be surprised and confused, as this kind of coconut pie was foreign to her taste buds. With expectations adjusted I was ready to proceed with baking, keeping my fingers crossed that as long as coconut remained the star of the show, she’d still swoon over the finished product.
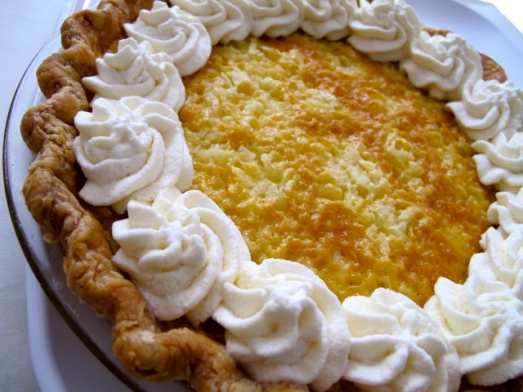
I was pleased to pieces with the simplicity of this pie’s assembly- throw all the custard ingredients a blender, pulse a few times, pour it over the coconut lining the crust, and viola!- it’s ready to pop in the oven. I did hit one little snag, however, with a seemingly odd amount of cornstarch called for in the recipe, not in keeping with any of my measuring utensils. 2/3 teaspoon? What’s with that? Teaspoons are never broken down into thirds- after excessive re-reading and double checking, I even took the book over to my Mom to make sure my eyes were still working. I subscribe to the theory that baking is a science, and measurements are given for a reason- precision is necessary if you want the recipe to work and attain the desired result. I did the math, and decided that 1/2 teaspoon plus a rounded 1/8 of a teaspoon would come closest, but I was definitely not a happy camper, fearing that would surely mean the end of my Coconut Custard Pie. Luckily, it seemed to have no ill effect- but, did anyone else notice this? Hmmm… I’m interested to hear if it was just me.

Though I wasn’t 100% sure that my pie was done at the allotted time, I’m glad I pulled it out with a slight jiggle in the middle. As it cooled, it set up perfectly- creamy, dreamy, and luscious. Every morsel was bursting with coconut flavor (I did give both the custard and my whipped cream a boost, adding a splash of coconut extract, but I think even without it, this pie would please any self-proclaimed coconut connoisseur.) The balance of richness was spot on- rich enough to be a little indulgence, yet light enough to enjoy more than a tiny sliver. The crust was buttery and flakey… though Melissa’s all-butter pie dough recipe won’t replace my go-to (which does contain shortening), it’s a nice alternative, rolled out easily, and was a great complement to the pie’s filling. One sure-fire way to judge a baked good’s deliciousness factor: if it’s polished off quickly- well, let’s just say this one certainly didn’t last long in our household!

I can’t say thank you enough to Ruby of I Dream of Baking for her FABULOUS SMS selection- I urge you to head on over to her site and scoop up this recipe. It’s a keeper for sure! And as always, don’t forget to check out all the other talented bakers’ pies, which were actually posted on Sunday… please pardon my tardiness (I was having a rough day health wise yesterday, which meant postponing my post). I can’t wait to see if this recipe was as big a hit with their families as it was with mine…

including the fluffiest member 🙂 (Don’t worry, Bella didn’t really get any!)

SMS: Orange Blueberry Muffins with Pecan Crumble

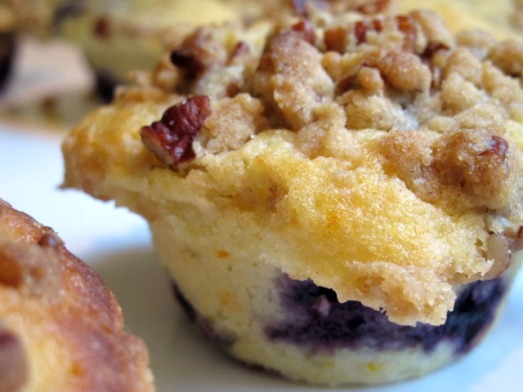
I hope that Chaya of Sweet & Savory will forgive me, but I bent the rules this week and strayed a bit from the selected recipe. I still made Orange Blueberry Muffins topped with Pecan Crumble, but my muffin base is not exactly from The Sweet Melissa Baking Book. Even though I made them over 9 months ago, the “sister” muffins to this week’s recipe, which featured peaches instead of blueberries, were markedly dense, heavy, and overall unimpressive. Though many of our highly creative and supremely talented bakers offered valuable suggestions to address the muffins’ textural inadequacies, I felt they were sadly beyond saving. 😦 And, it just so happens that I’ve been waiting for the perfect opportunity to try my beloved Cook’s Illustrated’s new version of Blueberry Muffins, which utilizes a unique method of injecting major fruity flavor. I figured if I honored the required orange-blueberry combination, and still topped my muffins with Sweet Melissa’s Pecan Crumble, I could keep my recently renewed participation in SMS going, and maybe offer an alternative to those who remained unsatisfied with the recipe as written.

Berry baked goods are typically banned from my household, with my MVT (Most Valuable Taster), my Mom, severely allergic. But, as it happens, my Dad LOVES a good berry studded muffin- and what kind of daughter would I be to deprive him of such an indulgence every once in a blue moon (no pun intended!)? While I hated the thought of making something my mom couldn’t also enjoy, in this particular instance, I decided it was for the greater good of SMS (and my Daddy’s belly). Not to worry though, coming up soon is a Coconut Custard Pie that has my Mom’s name written all over it!

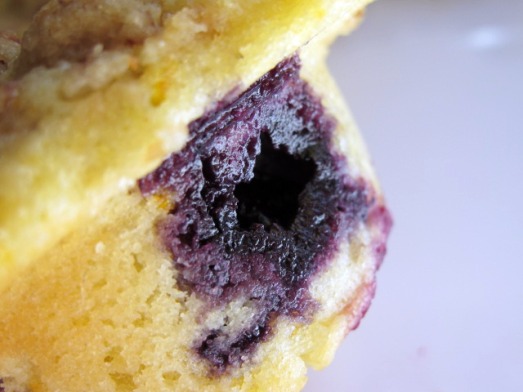
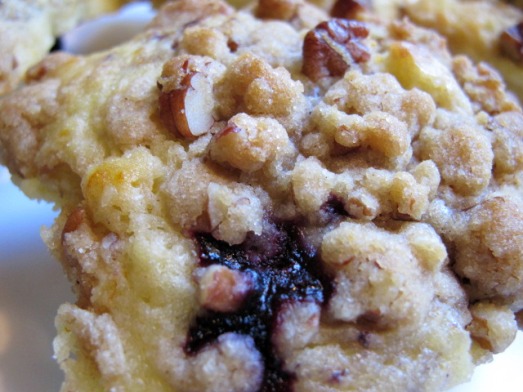
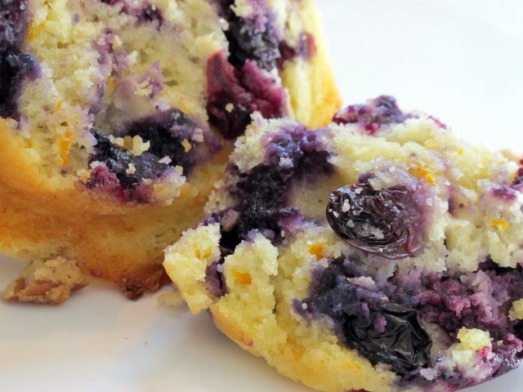
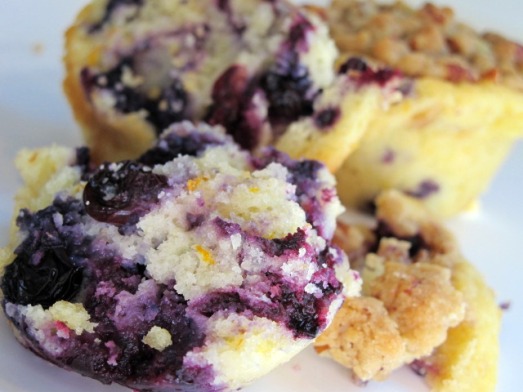
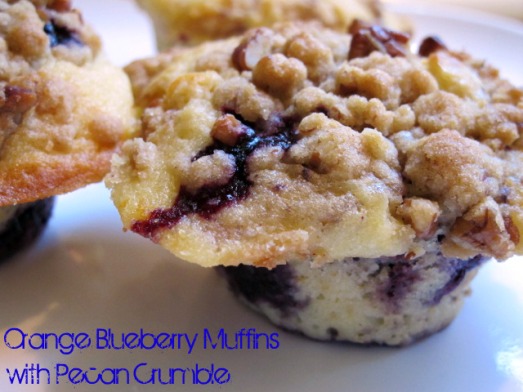
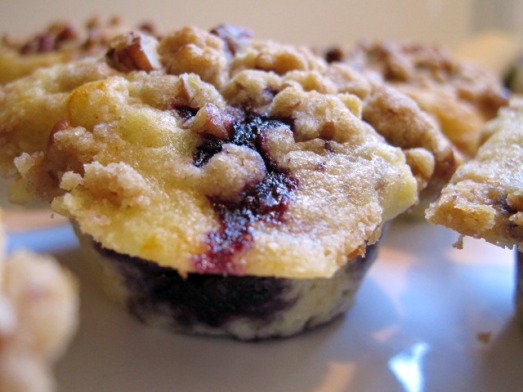
But first, on to the muffins! I think I may have hit the blueberry muffin mother-load with this one. Break into one of these little gems, and you’ll quickly discover they are not only jam packed and bursting with bright berry goodness, but also have an incredibly moist interior, and a soft, delicate, tender crumb. Beautifully balanced with the subtle citrus undertones of orange zest (a fun, unexpected spin on the classic blueberry-lemon combo), and crowned with a sweet, crunchy, nut-filled streusel topping, the ideal textural foil for what awaits inside; they are a truly a muffin lover’s dream. While my Dad is not nearly as prolific or expressive with his reviews as my Mom, he was surely not at a loss for compliments when it came to these breakfast beauties. If they pass the Daddy deliciousness test, they will definitely have a permanent home in my recipe files.

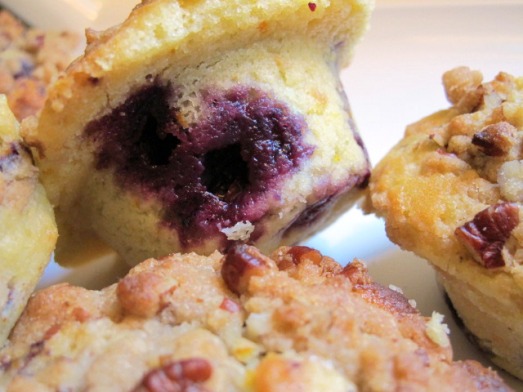
One of my favorite features of a Cook’s Illustrated recipe, is the inclusion of a detailed history describing how it was conceived. In the process of constructing the “Best” blueberry muffin, CI tested a variety of ways to achieve maximum intensity of sweet-tart fruity flavor. Ulimately, they landed on a technique that I think is absolutely brilliant: to pump up the volume, why not take some of the berries, cook them down on the stovetop to evaporate excess juices, thus concentrating their flavor, and swirl the resulting mixture right into the muffin batter? As it turns out, this thick, potent, deep-indigo jam, swirled in along with a substantial amount of fresh fruit, gave the muffins a distinctive one-two berry punch- exactly what they needed to put them over-the-top.

But what about the muffin base- after all, that was the problem I was dealing with in the first place… what did Cook’s do to ensure I didn’t fall into the same trap I had with Melissa’s? Well, those clever folks at CI had a few tricks up their sleeves (and some interesting science to back them up)! First off, they examined the mixing method: the creaming method was out after producing muffins that were too cake-like, and unable to support the hefty amount of fruit added to the batter. A more suitable choice, was the quick-bread or “muffin method” (haha! big surprise there!) that calls for mixing the wet and the dry ingredients separately, and then gently folding them together. They stressed the importance of not over-mixing (as with pancake batter), because “overly strenuous mixing encourages the proteins in flour to cross-link and form gluten, toughening the final product.” This method proved superior, and made for muffins with a hearty crumb, substantial enough to support the generous addition of berries. Next, to achieve ultimate moisture, they considered the fat used in the recipe. The balance of butter (which contributes great flavor) and oil (more effective at making baked goods moist and tender) was the key. Apparently, “unlike butter, oil contains no water, and is able to completely coat flour proteins and prevent them from absorbing liquid to develop gluten.” Equal amounts of both fats ended up producing just the right combo of buttery flavor, and moist, tender texture. Finally, to make the muffins as rich as possible, they sought a substitute for whole milk. Buttermilk offered a slight tang (complementing the berries) and appealing richness, while still being light enough “to keep the muffins from turning into heavyweights.” And do we want heavyweights, my friends? I think not! In my eyes, they successfully deduced a winning recipe for not only blueberry muffins, but “fill-in-the-blank” muffins, that would be delicious with any selection of mix-ins. No more futzing with Melissa’s metzah-metzah muffins (that means so-so for all you non Yiddush speakers out there). These babies are where it’s at!
Thank you Chaya for hosting this week- and again, please let me apologize for taking such extreme creative liberties with the recipe. I also wanted to extend a very warm welcome your way- SMS is lucky to have you and I’m looking forward to baking together each week! To check out all the other SMSter’s muffins, swing by our blogroll– can’t wait to hear from all you lovely ladies!

Before I forget, I was hoping to pick all your baker’s brains and get some feedback/suggestions regarding a recipe that’s coming up in 2 weeks: the Coconut Custard Pie. I’d really love to use the mini (4″) tart pans I just got my hands on (they’ve been on my wish list forever), instead of a single 9″ pie plate. I get all worked up and nervous about adjusting baking times and determining when things are done, and I wasn’t sure if they’d take significantly less time in the oven for the crust to brown/custard to set (the baking time as written is 50-55 min). Are there any tell tale signs a custard pie is done? Do you want a little jiggle in the middle or no movement at all? Any advice or ideas? I’d really appreciate your help, as I (of course) want the sweet treat I make special for my Mom to be delicious (and perfectly baked)! If I can’t figure it out, I’ll just make the full pie. Has anyone tried this recipe yet? Thanks in advance for your assistance! 🙂

BEST BLUEBERRY MUFFINS
adapted from Cook’s Illustrated (May/June 2009)

MAKES 12 MUFFINS

Ingredients:

2 cups (about 10 ounces) fresh blueberries, picked over
1 1/8 cups (8 ounces) plus 1 teaspoon sugar
2 1/2 cups (12½ ounces) unbleached all-purpose flour
2 1/2 teaspoons baking powder
1 teaspoon table salt
2 large eggs
4 tablespoons (½ stick) unsalted butter, melted and cooled slightly
¼ cup vegetable oil
1 cup buttermilk (see note)
1½ teaspoons vanilla extract
**2 teaspoons grated orange zest

Note: If buttermilk is unavailable, substitute 3/4 cup plain whole-milk or low-fat yogurt thinned with 1/4 cup milk. (*You can also use 1 cup of milk mixed with 1 tablespoon lemon juice or vinegar- let it sit for 10 minutes, and then it’s ready to use!)

Directions:

1. FOR THE MUFFINS: Adjust oven rack to upper-middle position and heat oven to 425 degrees. Spray standard muffin tin with nonstick cooking spray. Bring 1 cup blueberries and 1 teaspoon sugar to simmer in small saucepan over medium heat. Cook, mashing berries with spoon several times and stirring frequently, until berries have broken down and mixture is thickened and reduced to ¼ cup, about 6 minutes. Transfer to small bowl and cool to room temperature, 10 to 15 minutes.

2. Whisk flour, baking powder, and salt together in large bowl. Whisk remaining 11/8 cups sugar and eggs together in medium bowl until thick and homogeneous, about 45 seconds. Slowly whisk in butter and oil until combined. Whisk in buttermilk, vanilla, **and orange zest until combined. Using rubber spatula, fold egg mixture and remaining cup blueberries into flour mixture until just moistened. (Batter will be very lumpy with a few spots of dry flour; do not overmix.)

3. Use an ice cream scoop or large spoon to divide batter equally among prepared muffin cups (CI suggests that the “batter should completely fill cups and mound slightly,” however, that left me with a little overflow problem, i.e. merging muffin tops. I was worried that my muffins would be unattractive, but once split apart, they really looked fine. Next time though, I’ll only fill the cups 3/4 of the way, and make a few extra!). Spoon a teaspoon of cooked berry mixture into center of each mound of batter (I stuck my spoon down in a ways just to be sure the blueberry mixture went through and through). Using a chopstick or skewer, gently swirl berry filling into batter using a figure-eight motion. (If using: Sprinkle pecan crumble- recipe below- generously and evenly over muffins).

4. Bake until muffin tops are golden and just firm, 17 to 19 minutes, rotating muffin tin from front to back halfway through baking time. (My gigantic muffins took significantly longer to pass the toothpick test, at least an additional 3-4 minutes, but if they were normal size, the baking time given would probably be accurate). Cool muffins in muffin tin for 5 minutes, then transfer to a wire rack and cool 5 minutes before serving.

BEST BLUEBERRY MUFFINS WITH FROZEN BLUEBERRIES

Note: Our preferred brands of frozen blueberries are Wyman’s and Cascadian Farm.
Follow recipe for Best Blueberry Muffins, substituting 2 cups frozen berries for fresh. Cook 1 cup berries as directed in step 1. Rinse remaining cup berries under cold water and dry well. In step 2, toss dried berries in flour mixture before adding egg mixture. Proceed with recipe from step 3 as directed.

STEP-BY-STEP MAKING MUFFINS WITH BLUEBERRY FLAVOR THROUGH AND THROUGH

1. MAKE BERRY JAM

Cook half of fresh blueberries into thick jam to concentrate their flavor and eliminate excess moisture.

2. ADD FRESH BERRIES

Stir 1 cup of fresh blueberries into batter to provide juicy bursts in every bite.

3. PORTION BATTER

Scoop batter into muffin pans, completely filling cups. (Or almost filling cups!)

4. ADD JAM TO BATTER

Place 1 teaspoon of cooled berry jam in center of each batter-filled cup, pushing it below surface.

5. SWIRL INTO BATTER

Using chopstick or skewer, swirl jam to spread berry flavor throughout.

Pecan Crumble
slightly adapted from The Sweet Melissa Baking Book by Melissa Clark

Makes enough for two batches of muffins (Either cut the recipe in half or use the extra in a baked fruit crumble!) I wonder if you can freeze the leftover- thoughts anyone?

I’d advise you prepare this first, and have it ready to go when your muffins are portioned.

Ingredients:

• 3/4 Cup pecan pieces
• 3/4 Cup plus 2 tablespoons all-purpose flour
• 3/4 Cup firmly packed light brown sugar
• 3/4 Teaspoon salt
• Pinch freshly grated nutmeg
• 1/8 Teaspoon ground allspice
*I also added 1/8 Teaspoon cinnamon (just because I love it so!)
• 8 Tablespoons (1 stick) unsalted butter, melted and cooled slightly

Directions:

1. In a large bowl, stir together the pecans, flour, brown sugar, salt, nutmeg, allspice, *and cinnamon. Stir in the melted butter.

SMS: Peanut Butter Truffles

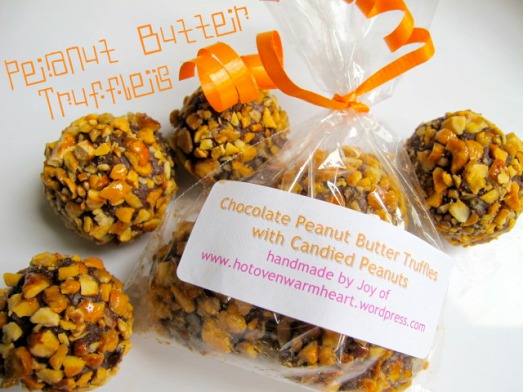
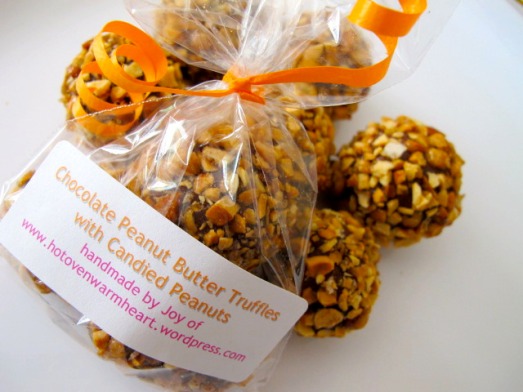
If you happened to read last week’s post chronicling my recent banana cupcake debacle, you can imagine how incredibly stressed I became when forced to shift gears under a time crunch, and come up with a quick and easy (yet still enticing, delicious, and somewhat impressive) substitute to bake for the very meaningful fund raising event I was contributing to. Thankfully, I could look no further than this week’s yummy SMS recipe, Peanut Butter Truffles, selected by one of our newer members, the highly talented and super creative Mara of Love Your Mother. Judging from the Hazelnut Truffles we made from the Sweet Melissa Baking Book last summer, I had a feeling that they would be similarly simple to assemble, but also rich, flavorful and unique enough for the bake sale. I am pleased to report that the truffles saved the day, and exceeded all expectations. Of course, I couldn’t help but complicate matters by adding extra steps to the project- but really, who could turn down a truffle dressed up with a caramelized candied peanut exterior? I called on David Lebovitz’s recipe (used to top my Black-Bottom Peanut Butter Mousse Pie with Pralined Peanuts), which never disappoints, and the added sweetness of his chopped nuts was the perfect counter-balance to the slightly bitter dark chocolate and salty peanut butter. That little bit of additional effort resulted in a combination that truly danced on the tongue! A few special touches with the packaging- some cellophane goody bags, colorful labels, and orange ribbon (more on the significance of that detail later)- and viola!, my truffles were ready for their debut at the 1st annual National Food Bloggers Bake Sale!

Isn’t it wonderful when you accidentally and totally unexpectedly stumble upon an exciting opportunity through your everyday blog surfing? That’s actually how I first got involved in SMS, and what a serendipitous discovery that turned out to be :)! Well a few weeks back, a digital banner caught my eye, advertising an upcoming event connected to the Great American Bake Sale. Sound familiar?- if you’re a food TV junkie like myself, you may have seen spokeswoman Sandra Lee discussing it on a Food Network commercial. Part of the phenomenal organization, Share our Strength, it’s a national campaign that mobilizes volunteers to host bake sales in their communities in an effort to help end childhood hunger in America. Although I’ve been interested in getting involved for quite a while, that banner convinced me the ideal time had arrived: on April 17th, food bloggers from across the country would unite to support the cause by holding bake sales in their states. I was filled with glee when I got in touch with the fabulous and super sweet Kathy-Ann of Mother May Have, who was coordinating for Massachusetts, and realized I could be a part of this extraordinary day, utilizing my baking to assist those in need. (I love on the Share our Strength website, they proclaim, “Together we can bake a difference!”)

Did you know that nearly 1 in 4 children in America struggle with hunger? That’s almost 17 million kids! With the weakened economy, poverty rates are on the rise, and every day, more and more children wonder where their next meal will come from.

Here’s a look at how Share our Strength is addressing this growing problem:

“Through No Kid Hungry, Share Our Strength funds the most effective anti-hunger organizations across the country, connects needy children and their families with nutritious food, teaches families how to cook healthy on a budget, and provides leadership that brings together public and private decision-makers to end childhood hunger, state by state. These funds help accomplish the following:

* Enroll more eligible kids in school breakfast, after-school snacks and meals, and their families in SNAP (food stamps).
* Bring community gardens and farmers markets to low-income neighborhoods.
* Bring affordable, fresh fruits and vegetables to urban corner stores.
* Teach at-risk families how to plan, shop for, and prepare healthy, low-cost meals at home.
* Help local food pantries, food banks and soup kitchens meet the pressing demand for more nutritious food.
* Increase awareness and understanding of childhood hunger and solutions to it.

Through all these means, [Share Our Strength is] working to ensure that all of America’s children have nutritious food where they live, learn and play.”

Since 2003, more than 1.7 million people have participated in Share Our Strength’s Great American Bake Sale, raising $6 million to make sure no child in America grows up hungry. But the big news? The first annual National Food Bloggers Bake Sale alone raised a grand total of over $16,500! Wow! Go baking bloggers! I felt truly honored to be a part of it, and am already looking forward to next year. I want to say a big thank you to Gaby of What’s Gaby Cooking for coordinating the entire event, and Kathy-Ann for leading us here in Massachusetts. Also- shout out to my new friend Carmen of Baking is my Zen, who just so happens to be a fellow SMSter! Her sale in NJ did amazing, raising more than $600- fabulous job Carmen! To see pictures from our sale in MA (including some of my goodies- the Peanut Butter Truffles and a selection of Coconut Jam Thumbprints made with 5 different types of homemade jams/preserves) check out this slide show.

For more information about Share our Strength and to find out ways you can help, visit their website, http://www.strength.org/. And don’t forget to check out the myriad of truffles whipped up by the other lovely ladies of SMS by exploring the blogroll!

Oh, by the way, the orange ribbon stands for hunger awareness… fitting right?

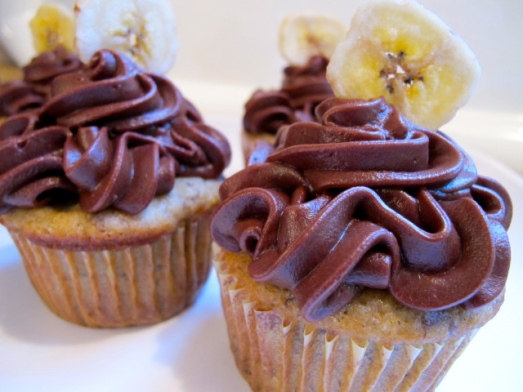
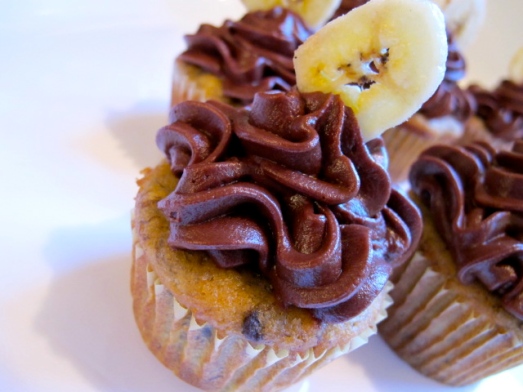
CSB: Banana Cupcakes with Chocolate Frosting

To all my long-lost, beloved baking/blogging buddies, I just want to say, I’m SO very glad to be back! I have missed you all terribly throughout my extended absence from CSB and SMS due to illness, but thankfully I’m slowly getting stronger, and I’m heading back to the kitchen. It’s been extremely hard to be away, unable to participate, but I hope you understand that my commitment and love for both groups have never wavered. I can’t wait to catch up with everyone and find out how you guys are doing! (I apologize profusely that this post is a few days past due… gosh darn sinus infections! But I wanted to put it up any way- I’ve been looking forward to getting back into the swing of things, and I won’t let a little added sickness stop me!) Much love to you all and thank you for being there… you mean more to me than you’ll ever know! Now, on to business.

Have you ever had a recipe make you feel like you’d lost your baking mojo? As if that special magic touch you once had to transform ordinary ingredients into something extraordinarily delicious, visually appealing, and all-around impressive had disappointingly disappeared? Well, for some reason beyond my comprehension, I faced that unfortunate predicament with this month’s (supposedly “simple”) Cake Slice Bakers recipe, Banana Cake with Chocolate Frosting. At first glance of the ingredients and instructions, I figured this would be a stress free sweet to tackle… nothing alarmingly unusual to be cause for concern. But as the making of my chocolate-topped banana cupcakes unfolded, I encountered one problem after another. In the past, such baking related crises have reduced me to tears, however, my determination to complete the assignment (my first one back with the group in a number of months) inspired me to surge forward undeterred. I’m proud to report that in the end, my perseverance was duly rewarded with moist, tender, flavorful cakes crowned with deep, dark, fudgy frosting. But oy vey, was it a journey getting there…

Back when this project appeared uncomplicated and straightforward, I planned to contribute the results to a fundraising bake-sale (I’ll be telling you all about that in an upcoming post!), so individual serving size was the way to go. The batter came together quickly, but I couldn’t resist adding just a wee bit more mashed banana than called for- it looked so forlorn left-over in the bowl and based on my past experience with banana baked goods, a little extra just adds to the flavor and moistness. Well, I think in this case, you can have “too much of a good thing,” as it also contributed to an overly wet batter. My only other deviation was to toss in about a half cup of mini chocolate chips, hoping it would better tie in the frosting. Despite my customary vigilance of ensuring all my ingredients are fully incorporated (I love love love my favorite rubber scraper), I somehow ended up with a patch of flour at the bottom of my bowl once ¾ of the liners were already filled. I stirred up what was left, and foolishly continued on (finishing off many of the less full cups with that bottom batter). I had no idea that those extra little scoops would end up baking into large, unattractive lumps, making those cupcakes sadly malformed.

After about 20 minutes, they passed the toothpick test, and although the tops were still dewy, my typical fear of over-baking set in, so out of the oven they came. Ten minutes of cooling passed, and I could no longer ignore the overwhelming gut feeling that my toothpick was a liar and the cakes were not fully cooked. Breaking into one confirmed my suspicion and panic set in. At that point, they either had to go back in the oven or in the trash. I was unsure if irreparable damage had been done, but I had to try to save them- I chose the oven. Over the next five minutes, I continued opening that door, pricking every single one of my 2 dozen cupcakes feeling for resistance, checking that the toothpick pulled out TRULY clean. When I believed they were finally done, I stared down at my dismal looking cooling rack feeling like an absolute baking failure. Even though I was zapped of energy and thoroughly discouraged, I had no choice but to regroup, re-strategize, and figure out what I could pull together for my bake sale, as it certainly would not be those cupcakes. I put them away and set them aside- I just didn’t have the heart to verify they were ruined, so they remained untouched until the following day.

The next night when my mom was on her way home from a long, hectic day of work, I decided to pour her a glass of milk, and warm up one of the cupcakes to try (Of course, I first double checked it wasn’t raw on the inside.) Obviously, I had very low expectations, (I was hoping for edible) but when she took a bite, her face lit up, she mumbled a long “Mmmmm,” and said, “Why did you think there was something wrong with these?- they’re delicious!” Imagine my surprise.

By the time I got around to the second component, the chocolate frosting, quite a few of the batch had been happily devoured. But without their proper topping, the naked cupcakes were teetering dangerously on the edge of qualifying as dessert; a more accurate classification would’ve probably been muffins. So on to part two. I was under the erroneous impression that the worst was behind me, and the rest of the recipe would be smooth sailing. Not so much. Five ingredients and five easy steps, I’d be sure to have smooth, thick, chocolate perfection in no time flat, right? Two attempts- reading and re-reading the directions, triple checking the ingredients, being extra careful- no luck. Both times, I ended up with a broken, clumpy, disgusting mess. I tried in two different pots, used two kinds of whisks, and on the 2nd try even sifted the cocoa trying to eliminate the chance of lumps. But the butter, evaporated milk, and cocoa NEVER CAME TOGETHER! No matter how long I stirred (10+ minutes at least), it just refused to cooperate. At first, it turned into a bunch of large dark clumps in what looked like boiling butter… vigorous whisking gave me a bunch of little spotted clumps in butter- but it certainly never became a “dark shiny essence,” as described in the recipe. I was regulating my heat, trying to keep it at a “gentle” boil, but it just WOULD NOT WORK! The 2nd time, I went ahead and continued on to the next step of adding the sugar (despite knowing it was definitely NOT the way it was supposed to be, and sugar wasn’t going to help matters)- and I got a bowl of gray pebbles. It was probably the farthest thing from a thick, smooth frosting that I’ve ever made or seen. Big mess. As you can imagine, by that point I was frustrated, exasperated, and exhausted- so I had to walk away. Again. I know I did something wrong, but I can’t for the life of me figure out what it was! I’ve never made a cooked chocolate frosting, so I’ll admit, it seemed like a foreign process to begin with. I reached out to both Steph and Katie, but neither could solve the mystery of my frosting disaster. I received approval from Katie to utilize a different frosting, and I was relieved that I wouldn’t be wasting additional ingredients, time, and energy on a 3rd try. (If anyone thinks they know the source of the problem, I’d love your advice- as always!)

I thought it appropriate to call upon the other cookbook CSB bakes from, Sky High, for my replacement, and settled on the Instant Fudge Frosting. Now this is a recipe I can stand behind, and one that truly deserves the designation of “simplistic.” My dad went so far as to say it was “out-of-this-world.” Sorry Southern Cakes, but when it comes to chocolate frosting, Sky High’s got you beat.

Instant fudge frosting
from Sky High: Irresistible Triple-Layer Cakes by Alisa Huntsman and Peter Wynne

Ingredients:
6 oz. unsweetened chocolate, melted and cooled
4 ½ cups confectioner’s sugar
3 sticks unsalted butter, room temperature
6 tablespoons half and half (I used 3 tablespoons heavy cream + 3 tablespoons milk)
1 tablespoon vanilla extract

Directions:
Place all of the ingredients in a food processor (make sure to use a large one!) and pulse to incorporate. Then process until the frosting is smooth and uniform.

While part of me is embarrassed to admit all my kitchen blunders- (I’m sure this post portrays me as a terrible baker!)- I think it’s important to admit when things go awry. Sometimes it’s just not your day. It’s okay to get discouraged and disappointed, but what matters most is refusing to let those feelings keep you out of the kitchen. My mom made it all worth it when she shared how proud she was that I never gave up or broke down when things didn’t turn out right. That meant more to her than the most perfect batch of cupcakes ever could. What a wonderful mom, huh? She gave me a big hug, and I’m glad in the end, I gave her dessert.

SMS: Chocolate Pie Crust – Black-Bottom Peanut Butter Mousse Pie with Pralined Peanuts

To my fellow SMS bakers: Please allow me to apologize profusely that I am presenting this post late. Unfortunately, I have been struggling with my health, and while I’ve been trying very hard to keep up with this fabulous group, it has been difficult for me to complete all the assignments by the specified deadlines. This is absolutely not a reflection of my commitment or desire to continue, as I am honored to be a part of Sweet Melissa Sundays and you all mean so much to me. Baking and blogging with you fabulous ladies has been an invaluable refuge for me, and pushing myself to get back in the kitchen has truly been therapeutic and in a way, very healing. I hope you all understand, and will bare with me a bit- I will do the best I can to participate, and share my results as soon as possible! And now, on to the latest assignment… Chocolate Pie Crust with the filling of your choice!

Julia Child said, “Find something you’re passionate about and keep tremendously interested in it.” I think part of the reason I am so passionate about baking, is because it is such a tremendous outlet for artistic expression. Whether you’re developing a harmony of flavors by playing with the combination of ingredients, adapting a recipe to make it your own, or executing your vision for a beautiful presentation, baking provides limitless opportunities to evoke inner creativity. Once the basic techniques are mastered and the kitchen becomes a comfortable domain, the imagination is free to run wild, and the plate transforms into a canvas for works of stunning originality. I attribute much of my culinary creativity to the constant inspiration I receive from my bountiful batch of blogging buddies, whose talent shines through in all the beautiful, mouth-watering treats featured on their sites. So imagine my excitement to discover we’d be tackling the very first SMS selection that encouraged each baker to utilize an additional recipe of their choice from a source outside our common cookbook. We were all to bake the same Chocolate Pie Crust, but as for the filling, we were given carte blanch. As much as I was looking forward to some extra brainstorming and recipe research (one of my favorite pass times), I was even more delighted by the prospect of making the internet rounds to explore the mélange of magnificent pies, each one filled to the brim with passion and creativity.

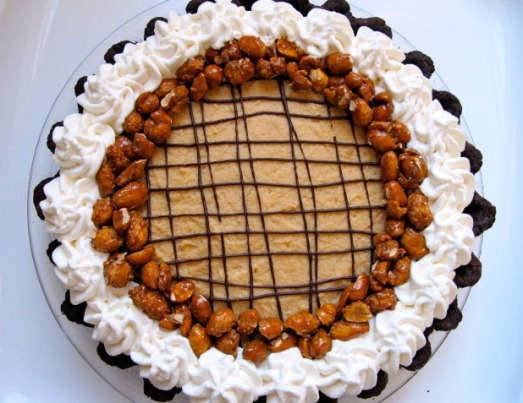
In most cases, I probably would have spent hours pouring over my collection of cookbooks, browsing my favorite websites, and flipping through my binder of “must-tries,” but this time around, I immediately knew exactly what direction I wanted to go in. I’ve had a certain pie waiting patiently in my mind’s recipe queue, just calling for the perfect occasion to be made. And it was time for this pie’s debut. May I present to you, Black-Bottom Peanut Butter Mousse Pie with a Chocolate Pie Crust and Pralined Peanuts. I know, it’s a (delectable) mouth full. I’ll admit, there are multiple components, which require various steps and a wee bit of time, but the overall process is really manageable and relatively simplistic. And I promise- this one is SO worth the effort.

I started from the ground (or pie plate) up, first making the pie dough. Reminiscent of Pate Brisee- a French short crust pastry dough made from a mixture of flour, a little sugar, salt, fat (butter and/or shortening), and ice water- this dough also contained a good amount of dutch-processed cocoa powder, lending it a distinct chocolatey flavor. Thankfully, I’ve made a few pie crusts in my day and am familiar with the process, so I was confident enough to alter the mixing method called for in the book. I opted to use my handy dandy food processor rather than a pastry blender and brute strength (…it’s in short supply around here!), and it came together beautifully. I’ve found that the two keys to a tender, flakey pie crust are: 1. Keep it COLD and 2. Don’t overmix. Starting with super cold ingredients and ensuring the dough remains thoroughly chilled until the moment it hits the heat of the oven will produce consistently scrumptious results. It is important not to break down the butter too much- when those little flecks of butter in the dough are introduced to heat, they melt, creating tiny pockets in the flour that surround it- the steam that escapes from the butter’s water content lifts these pockets, producing the flakiness we’re all after. Remember, if you can see those flecks, you will have flakes! I like my butter to be frozen when I mix it into my flour, and I try to make quick work of rolling/handling- both help to retain the bits of butter of in the dough. And of course, mix just until the ingredients come together to avoid the pitfalls of a tough, chewy dough (over-developed gluten is never a good thing!) Some say that the food processor makes it easier to accidentally overwork the dough- to prove them wrong, only use it to mix the dry ingredients and cut in the fat. Then, fold the water in by hand and stop as soon as it holds together. An extra tip for this particular dough- instead of rolling it out on a lightly floured surface, why not dust the counter (covered with parchment paper for easy clean-up) with cocoa powder? Works like a charm!

Next came the filling, a succulent contrast of silky smooth dark chocolate ganache and fluffy peanut butter mousse. The ganache is an extra punch of chocolate, playing off the cocoa in the crust, and deepening the flavor. I used a combination of bittersweet and semisweet chocolate- in retrospect (keeping in mind my tasters’ preferences) I would have gone heavier on the semisweet, simply to please my Mom’s delicate palate. But even the dark chocolate hater could not deny the luscious texture this rich layer provides. As for the peanut butter mousse, it is moist and light, yet offers a strong, prominent nutty flavor. When preparing the mousse, take care when folding in the whipped cream and you’ll be rewarded with a nice and airy layer. The first third of your cream can be mixed in a little more vigorously to lighten the peanut butter mixture, but the majority should be folded as gently as possible. It might take a few turns around the bowl before those white streaks disappear, but unless you want dense mousse, stick with it!

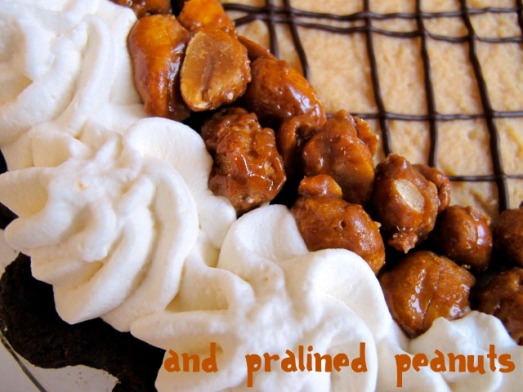
To push the presentation over the top, I went a little “nuts” with the garnishes. I thought I needed to add another textural element to my pie- a crunch was definitely in order. I remembered a recipe in David Lebovitz’s outstanding compendium of all things ice cream, The Perfect Scoop, for Pralined Almonds (which I, of course, adapted to peanuts). Having conquered my fear of caramel, these glossy candied nuts were a cinch to pull together, and were made and cooled in the time it took for my pie to chill. Surprisingly, these little gems seemed to steal the show, and were arguably my Dad’s favorite part of the whole shebang. (I caught him making extra trips into the kitchen, sneaking nuts off the baking sheet, and later out of the bag, for the rest of the day.) On his day-two slice, he even sprinkled a few extra on top. On David Lebovitz’s blog, he suggests serving these addictive nuts as an appetizer, and I’m sure they’d be the hit of the party.

With a few finishing touches of a chocolate drizzle and some sweetened whipped cream rosettes, the presentation of this pie is certainly impressive, and I had so much fun dressing it up. When all the elements came together, I was really proud of the finished dessert, and was very pleased by the positive reaction I received from my tasters. I’d definitely place this pie in the “decadent” category, but for a special occasion (especially if you have a chocolate-peanut butter lover in your life), it is fantastic choice that I highly recommend. Keep this one in mind, and before you know it, the ideal opportunity will arise to give it a try. I only wish I had made it sooner!

A big thank you to Donna of L’Amour de Tarte for her bold choice- head over to her website for the Chocolate Pie Crust recipe. Also, check out the SMS blogroll to see what everyone else came up with- I know I’ll be inspired by the plethora of creative ideas! You’ll find all the yummy recipes I went with below:

Black-Bottom Peanut Butter Mousse Pie
Bon Appétit | August 2006 via Epicurious.com

Ingredients:

* 1 1/3 cups bittersweet or semisweet chocolate chips (about 8 ounces)
* 2/3 cup plus 1 3/4 cups chilled whipping cream, divided
* 2 tablespoons light corn syrup
* 2 teaspoons vanilla extract, divided

* 6 ounces (1 cup) peanut butter chips
* 2 tablespoons creamy peanut butter (do not use old-fashioned style or freshly ground)

Directions:

Combine chocolate chips, 2/3 cup cream, corn syrup, and 1 teaspoon vanilla in microwave-safe bowl. Microwave on medium heat until chocolate softens, about 3 minutes. Whisk until melted and smooth. Spread chocolate mixture over bottom of crust. Freeze 10 minutes.

Microwave peanut butter chips and 3/4 cup cream in large microwave-safe bowl on medium heat at 15-second intervals just until chips soften, stirring often. Whisk in peanut butter and 1 teaspoon vanilla. Cool to barely lukewarm. Beat remaining 1 cup cream and 2 tablespoons sugar in medium bowl until very thick but not yet holding peaks; fold into peanut butter mixture in 3 additions. Spoon mousse over chocolate layer. Chill at least 1 hour and up to 1 day.

Pralined Peanuts
Adapted from The Perfect Scoop by David Lebovitz

Ingredients:

1/4 cup (60 ml) water
1/2 cup (100 g) sugar
1 cup (135 g) whole raw peanuts, unsalted
1/8 teaspoon coarse salt, preferably fleur de sel

Directions:

Mix the water, sugar, and peanuts in a large, heavy-duty skillet. Put the pan over medium high heat and cook, stirring constantly with a wooden spoon, until the sugar dissolves and the liquid boils.

Lower the heat to medium and continue cooking and stirring for just a few minutes, until the liquid crystallizes and becomes sandy. Very soon the crystals of sugar on the bottom of the pan will begin to liquefy. Stir the dark syrup at the bottom of the pan over the nuts to coat them. Continue to stir the nuts and scrape the syrup over them until the peanuts are glazed and become a bit glossy and shiny. (Sometimes I remove the pan from the heat while they’re cooking to better control the glazing, so they don’t get burned.) Remove the pan from the heat and sprinkle the peanuts with the salt. Tip them onto an ungreased baking sheet (I lined with parchment paper) and allow them to cool completely. As they cool, break up any clusters that are stuck together.
Storage: Pralined peanuts can be stored for up to 1 week in an airtight container at room temperature.

SMS: Chocolate-Honey Creme Caramels

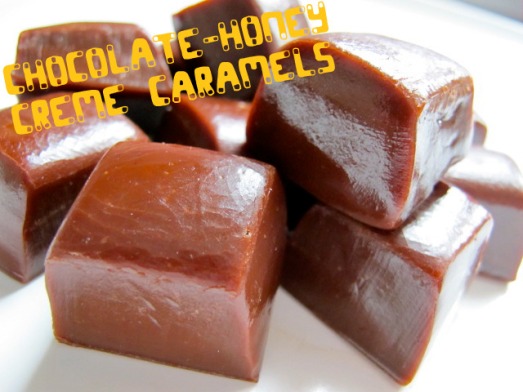
So we’re off and running with a brand New Year of Sweet Melissa Sundays, and I’m so pleased to start with a recipe chosen by my adorable and hilarious friend Jeannette of The Whimsical Cupcake: Chocolate-Honey Creme Caramels. Though I didn’t realize SMS was back in action until the last minute, I was able to whip up a batch of these gooey-chewy candies with ingredients I luckily had on hand. And bonus!- I got to use my new handy-dandy digital thermometer.

After I nearly scolded myself trying to take the temperature of boiling-hot, bubbling red raspberry jam (the probe on my old-school thermometer wasn’t long enough to reach when attached to the side of the pot), I decided that with plans to pursue future jam and candy making ventures, I needed to outfit my kitchen with the proper hardware. Of course, I did some online research, reading a slew of reviews, and finally settled on this model, which I found, no problem, at the local Le Gourmet Chef. Does anyone else feel dangerous walking into one of those stores? I feel like I’m rendered powerless when faced with aisles chock full of tempting cooking and baking gadgets, shiny pans of every shape and size, and cutesie kitchen gear that I certainly don’t need, but just can’t live without. Maybe it’s just me. This time I made it out alive with just the thermometer. And a cookie scoop. C’mon, I didn’t have that size! All in all I’d say I was pretty good. Thankfully, I was on a mission. I had to go home and get caramel-izing.
Since my past experience with caramel has been touch-and-go, my heart began beating faster when I read that we’d be exploring it again. But I trust Jeannette, so I was off to the stove! One thing I thought was very interesting, was that nearly all the ingredients were combined at the beginning, and you basically just stir and wait for the mixture to come up to temperature (which, by the way, took between 20-25 minutes!). This recipe called for the syrup to reach the “firm-ball stage,” specifically 248 degrees F. I discovered a wealth of information on baking911.com about the different temperature stages used in candy making- there’s a very helpful chart that demystifies the terminology- and learned that “firm-ball” indicates a final product that is malleable and will flatten when squeezed. With that in mind, I was happy to find my block of set-up caramel exhibited the characteristic description.

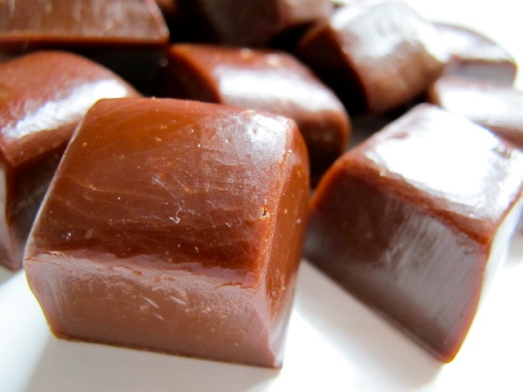
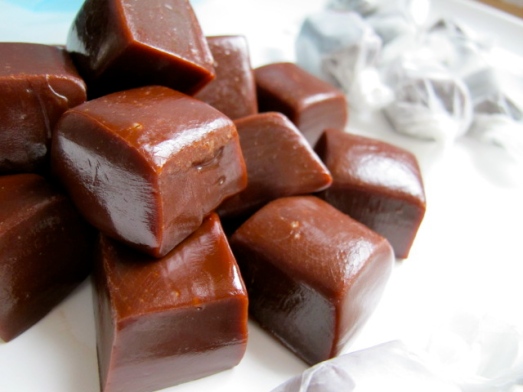
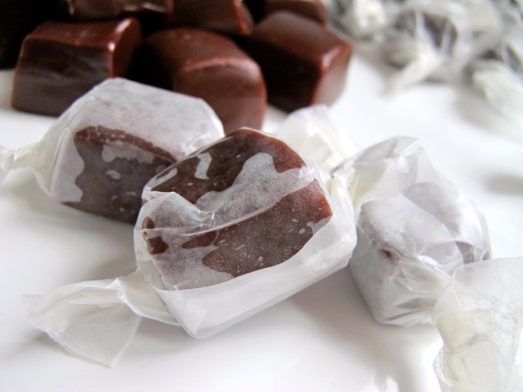
After completing the sticky business of cutting into 64 bite-size squares, I offered my Mom a taste, and she hummed her usual “Mmmm!” Always a good sign. She loved the balance of rich chocolate and sweet honey, and thought the taste was exceptional, rivaling gourmet quality. While I didn’t win over my caramel-hating Dad- he too liked the taste, but couldn’t overlook the texture he typically dislikes- I considered these sweets a success, and I’m definitely looking forward to sharing… boy, once these little guys are all nice and cozy in their twisted wax paper wrappers and piled high, there’s really a mountain of ’em. A quarter or half batch probably would have been plenty for us, (I knew I should have followed Hanaâ’s lead!) But, I have a feeling they’ll still somehow end up disappearing!

A BIG shout-out (and thank you) to my dear Jeannette– please head on over to her fabulous blog, The Whimsical Cupcake, for the recipe… not only will you see some mouth watering creations, but I guarantee she’ll put a smile on your face! If you’re like me, and the thought of caramel making evokes your inner cowardly lion, give these relatively simple Chocolate-Honey Creme Caramels a shot, and let me know if you need a personal candy making cheerleader- I’ll absolutely be right there. That’s what virtual baking buddies are all about!

I want to wish all of you a FANTASTIC New Year filled with much love, great happiness, and good health. I am so looking forward to sharing many more of my kitchen adventures with you on Hot Oven, Warm Heart, and baking together with all you incredibly talented bloggers throughout 2010! Let’s have lots of fun creating a wide array of delicious delicacies, and chatting about our experiences. The very best recipes may be yet to come 🙂