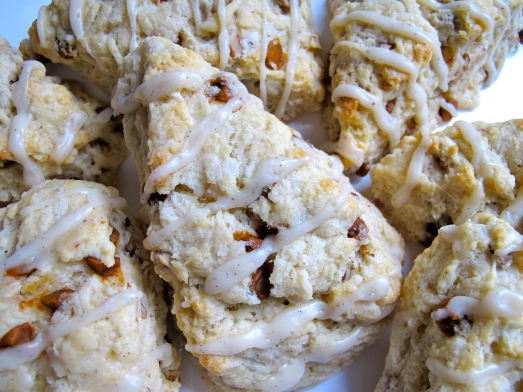
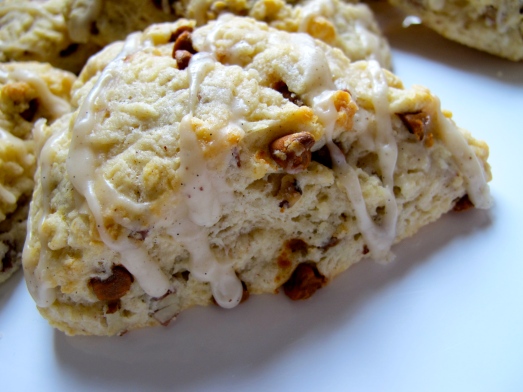
ABC: Cinnamon Chip Pecan Scones with Brown-Butter Vanilla Bean Glaze

Arguably one of the best perks of blogging is the ability to connect with others who share a similar passion, and form genuine friendships in the process. I am so thankful that I met highly talented, especially thoughtful and caring blogger, Hanaâ of “Hanaâ’s Kitchen,” who has not only taught me a great deal about baking, but has also been a strong support along the way. I am so excited to be joining a fantastic group she began called the Avid Baker’s Challenge. Currently baking out of The Weekend Baker by Abigail Dodge, the avid bakers make a selected recipe together each month and then share their results. For May, our project was scones, with the flavor profile baker’s choice. Oh, the possibilities! Seriously, I played around with different combinations for the majority of the month of April. Does your mind ever wander to ponder the potential taste of a soon-to-be-made baked good, or is it just me?

Originating in Scotland, the first scones were made with oats, shaped into a large round, scored into four or six wedges (triangles) and griddle-baked over an open fire (later, a stovetop) like a thick pancake. With the advent of baking soda in Victorian times, scones were baked and transformed into customizable teatime accompaniments. With strong historical ties to England as well, scones are steeped in British tradition, and are a distant relative of the crumpet and English muffin. Unfortunately, they are often known to be dry as a bone, tasteless, and only made palatable by the addition of plenty butter, clotted cream, jam, or lemon curd. Their modern American counterpart, a quick bread closely related to biscuits, reflects our taste for rich, sweet breakfast pastries. Through the years, scones became coffee shop regulars, usually over-sized, misshapen muffin or cake-like objects, far removed from their British ancestors.

Since the last time I made a batch, I read about a variety of techniques aimed at creating the ultimate light and flakey scone, avoiding heavy, leaden variations at all costs. One method focuses on incorporating the butter, as lofty pastry depends on distinct pieces of butter distributed throughout the dough that melt during baking, allowing steam to escape and leaving pockets of air behind. To achieve this, the butter must be as cold and solid as possible until baking. The problem with traditional methods of cutting butter into flour, either with your fingers or a food processor, is that the butter becomes too warm during the process. A number of sources. including Cooks Illustrated and one of my favorite cookbooks, A Passion for Baking by Marcy Goldman, point to a fresh idea- freezing the butter and grating it on the large holes of a box grater before quickly and evenly cutting it into the flour. This succeeds at keeping the butter cold, and the the interior of the resulting scone tender and moist without being overly dense. I couldn’t wait to try such a novel concept, and this baking assignment seemed like the perfect opportunity.

I also called upon numerous other tips I found through research in my quest to achieve my best ever scones:

  • Just as the lightest bread is produced from the wettest dough, scone dough should be quite soft- resist the temptation to work more than 1-2 tablespoons of additional flour into the dough, just enough to facilitate handling.
  • Don’t overmix! In fact, work it as lightly and minimally as possible. Never knead the dough (beyond bringing it together) to avoid activating the gluten in the flour any more than necessary.
  • When shaping, either form a round and cut into wedges, or use a biscuit cutter, however, don’t twist it when you push down. It will seal the edges of the dough and prevent the scone from rising as high as possible.
  • If you use an egg wash or dairy glaze on top of your unbaked, cut scones, try not to let it drip down the sides. This also inhibits the rise.
  • Before a trip through the oven, chill scones for about 15 minutes in the freezer or an hour in the fridge- ensure the pieces of butter throughout are as cold and solid as possible.
  • Add ½ cup of water to a pan and place on the lower rack of the oven 10 minutes before you bake the scones- this will create a steamy environment that will assist with the rise. Also, bake scones in the upper third of the oven.
  • Don’t overbake or the resulting scones will be dry and crumbly. Look for bottoms that are golden brown and tops that are set but only lightly golden.
  • You can freeze scones before baking and pull them out as needed- simply shape, cover with plastic wrap and freeze until solid, about an hour. Bag airtight and return to the freezer. When you’re ready to bake, there’s no need to thaw them; just place frozen scones on a pan, and bake as directed, giving them about 5 additional minutes.
  • Although scones are best eaten straight from the oven, and certainly the day they’re made, leftover baked scones can be frozen too. When you want to serve, the author recommends that you thaw and reheat them in a skillet or griddle, covered with foil or a lid, heating on low to medium-low until warmed through.

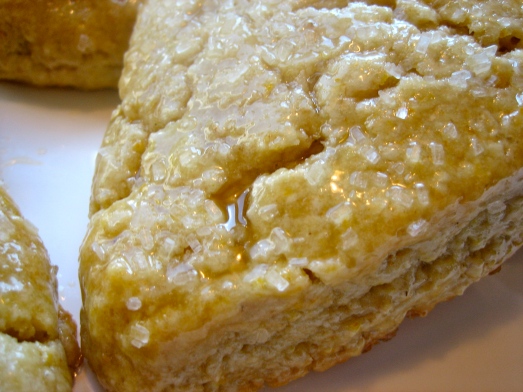
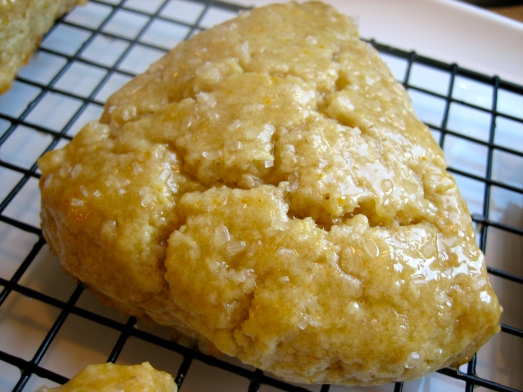
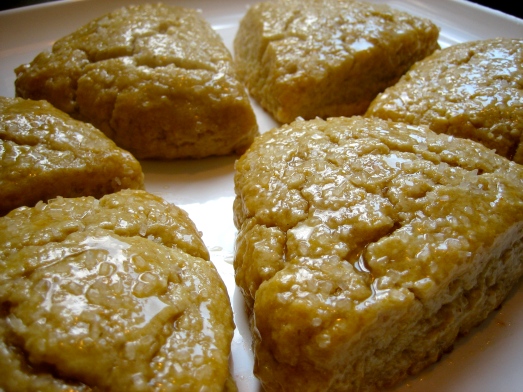
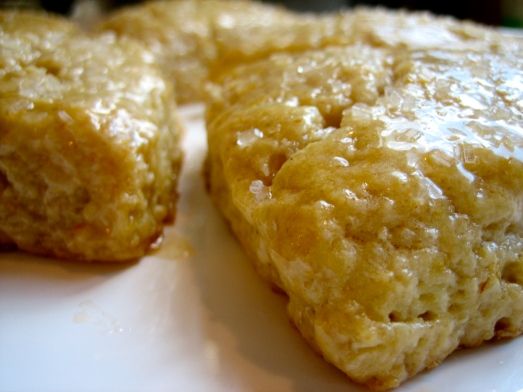
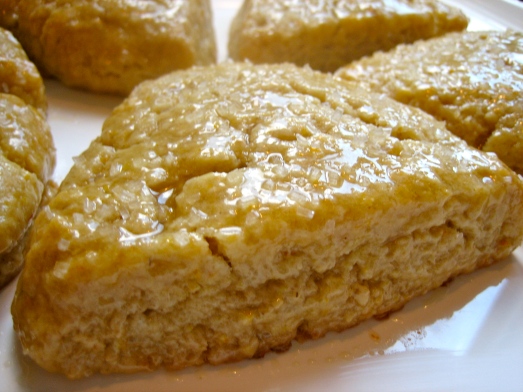
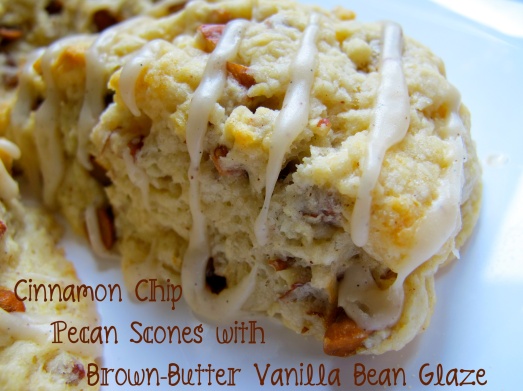
So did my batch benefit from all the tips and tricks I found? Well, their crisp outer crust gave way to a light, fluffy, moist interior packed with layer upon layer of flakey goodness. A slight tang from the buttermilk paired beautifully with the warmth of the spicy cinnamon and toasty pecans, and was foiled by the sweet nuttiness of the brown-butter vanilla bean glaze. Tender and buttery, these scones made my inspiration (a scone often ordered by my Mom along with her latte) a distant memory. Let’s just say they were my first ABC success, and I can’t wait to explore all the recipes to come. Don’t forget to check out what all the other bakers’ made this month, and grab a copy of The Weekend Baker. Thanks again Hanaâ for including me and making me feel so welcome 🙂

Note: To recreate my flavor profile- add 1/4 tsp cinnamon to the dry ingredients, and stir in 2 oz cinnamon chips and 1 1/2 oz chopped toasted pecans (about 3/4 c add-ins total). While the scones are baking, make a half-batch of this glaze, using an equal amount of vanilla bean paste (one of my FAVORITE ingredients… I love those magical little black dots!) instead of vanilla extract. Drizzle over the cooling scones and Viola!

Coming Back and Bloggers Bake For Hope 2012

Hi there.

Remember me?

Bubbly baking blogger from Boston passionate about serving scrumptious sweets to her family and friends? Sound familiar?

Well, I have most certainly not forgotten you. On the contrary, you’ve been on my mind and in my heart all this time- it’s been deeply distressing to be separated from all the phenomenal people who used to visit my site, as well as my fellow blogging buddies and baking groups. While it’s been more difficult than you can imagine for me to jump back in the mix, my very special role as a contributing member to the baking blogosphere is simply too important to abandon forever. It is an honor and a privilege to share my kitchen conquests with you, and I treasure the unique opportunity to connect with other talented and enthusiastic cooks and bakers from literally all over the world. Thankfully, I’ve come to know you lot as an extremely understanding and supportive group of folks, who welcome my participation with open arms whenever possible. Looking forward, I plan to partake in some new and exciting endeavors, including joining the Avid Bakers Challenge, an amazing assemblage of bakers led by my dear friend Hanaâ of “Hanaâ’s Kitchen,” who tackle the same recipe together each month. In the immediate future, I have the privilege of utilizing my baking to contribute to a great cause, Bloggers Bake For Hope 2012. When I discovered this exceptional effort to raise funds for the Avon Foundation, I just knew it was time to return to “Hot Oven, Warm Heart,” and in some small way, draw upon my baking for good.

Organized by two highly generous bloggers, Jen of “Beantown Baker” and Fiona of “A Boston Food Diary,” Bloggers Bake for Hope is an online virtual bake-sale event, with all proceeds benefiting the Avon Foundation. Participating bloggers will provide information about their baked goods, and each item will get its own blog post, which can be found here, when the bake sale opens on Monday, April 30th. If you would like to place a bid, leave a comment on the appropriate page with the dollar amount (All bidding will start at $15). Bidding will close on Wednesday, May 2nd, with the highest bidder being awarded the item. They will be notified via email during the weekend of May 5th, at which point they can return to the homepage, and pay via Paypal by clicking on the button reading “donate.” Once the donation has been made, the winner’s address will be sent to the baker, who will ship the baked goods sometime during the month of May. It’s really much simpler than it sounds, I promise!

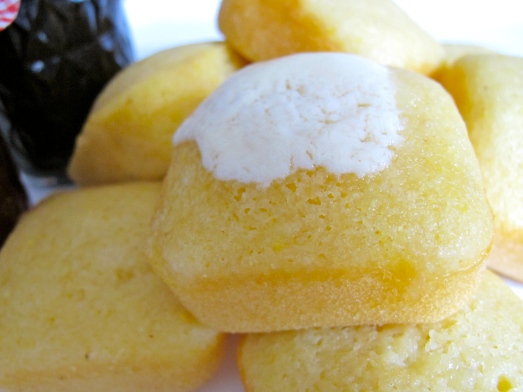
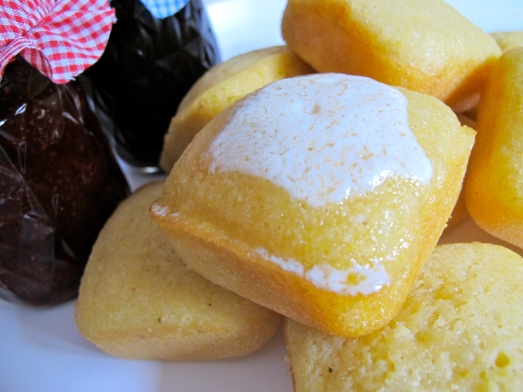
When selecting my submission, I drew upon my greatest inspiration, both in life and the kitchen, my beloved Grammy. She cooked her way into countless hearts over the years, serving up mouth-watering meals and special memories that will stay with those she touched forever. My best friend, and my hero, Grammy and I shared a sincere passion for preparing food and serving others that goes beyond words. Along with innumerable other life lessons that have shaped me into the woman I am today, she taught me what it means to translate love to the plate. As my passion for baking grew, her support was inimitable and I could see the pride she felt shining deeply in her eyes. Of the many treats I had the pleasure of making for her, these simple corn muffins, always served alongside my homemade jam, made her light up in a way I can’t describe. It was as if she couldn’t believe her granddaughter had possibly baked something so delicious. I never understood what was so special about these muffins, but I certainly understood how special she made me feel when she ate one.

I hope the recipient of my package, complete with Grammy’s favorite corn muffins and jam, knows just how much I appreciate their support, and that tucked inside they just might find a little bit of love I was sure not to forget.

Me and Grammy in her kitchen, 1989

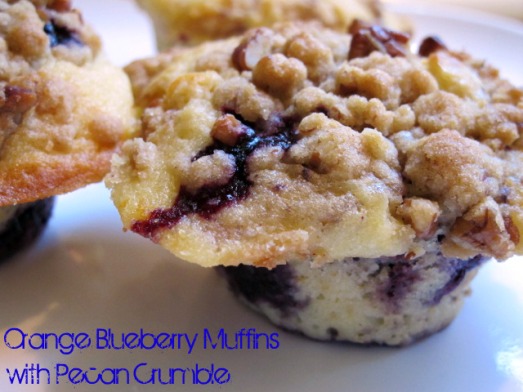
SMS: Orange Blueberry Muffins with Pecan Crumble

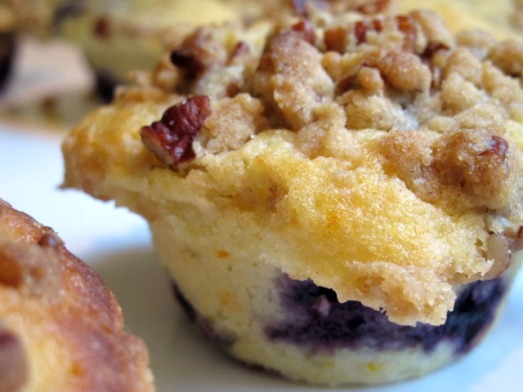
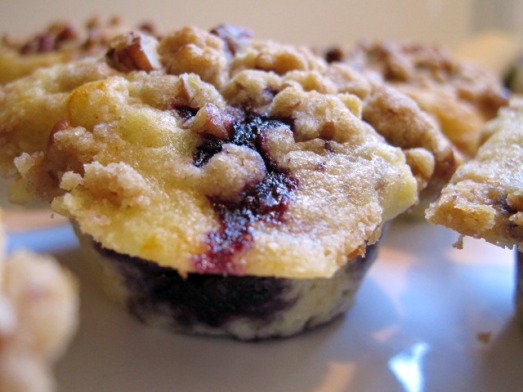
I hope that Chaya of Sweet & Savory will forgive me, but I bent the rules this week and strayed a bit from the selected recipe. I still made Orange Blueberry Muffins topped with Pecan Crumble, but my muffin base is not exactly from The Sweet Melissa Baking Book. Even though I made them over 9 months ago, the “sister” muffins to this week’s recipe, which featured peaches instead of blueberries, were markedly dense, heavy, and overall unimpressive. Though many of our highly creative and supremely talented bakers offered valuable suggestions to address the muffins’ textural inadequacies, I felt they were sadly beyond saving. 😦 And, it just so happens that I’ve been waiting for the perfect opportunity to try my beloved Cook’s Illustrated’s new version of Blueberry Muffins, which utilizes a unique method of injecting major fruity flavor. I figured if I honored the required orange-blueberry combination, and still topped my muffins with Sweet Melissa’s Pecan Crumble, I could keep my recently renewed participation in SMS going, and maybe offer an alternative to those who remained unsatisfied with the recipe as written.

Berry baked goods are typically banned from my household, with my MVT (Most Valuable Taster), my Mom, severely allergic. But, as it happens, my Dad LOVES a good berry studded muffin- and what kind of daughter would I be to deprive him of such an indulgence every once in a blue moon (no pun intended!)? While I hated the thought of making something my mom couldn’t also enjoy, in this particular instance, I decided it was for the greater good of SMS (and my Daddy’s belly). Not to worry though, coming up soon is a Coconut Custard Pie that has my Mom’s name written all over it!

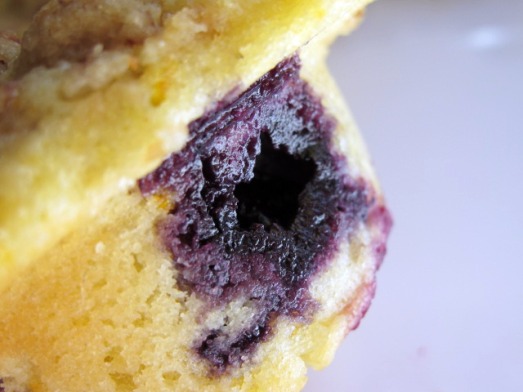
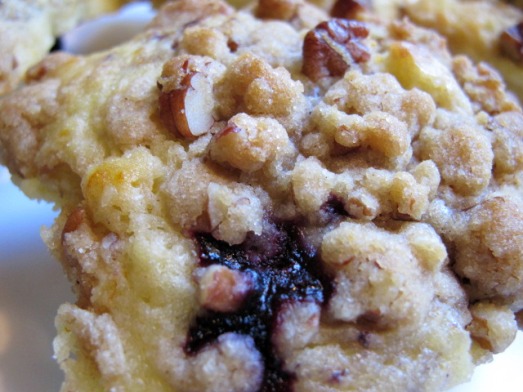
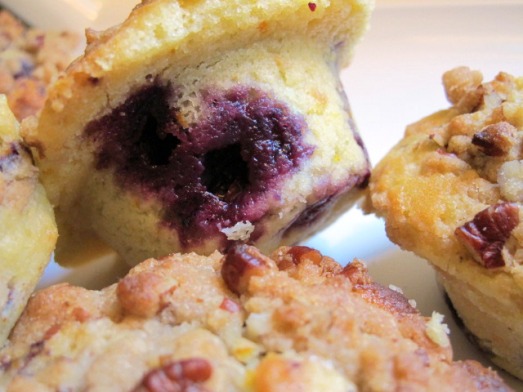
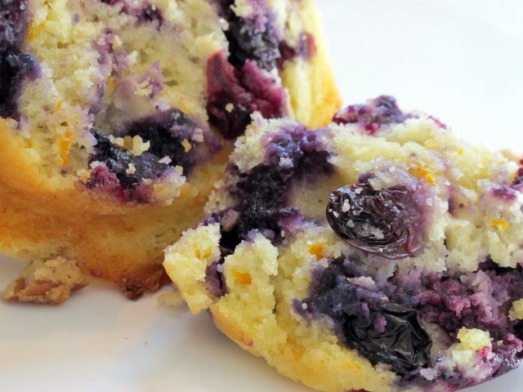
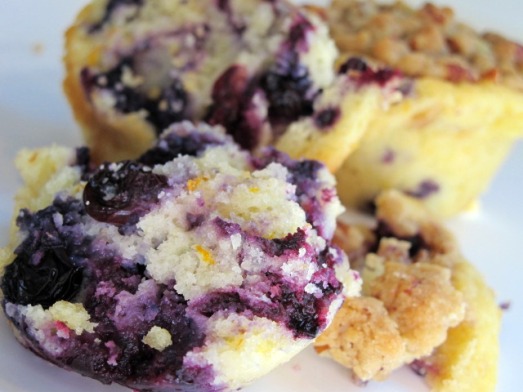
But first, on to the muffins! I think I may have hit the blueberry muffin mother-load with this one. Break into one of these little gems, and you’ll quickly discover they are not only jam packed and bursting with bright berry goodness, but also have an incredibly moist interior, and a soft, delicate, tender crumb. Beautifully balanced with the subtle citrus undertones of orange zest (a fun, unexpected spin on the classic blueberry-lemon combo), and crowned with a sweet, crunchy, nut-filled streusel topping, the ideal textural foil for what awaits inside; they are a truly a muffin lover’s dream. While my Dad is not nearly as prolific or expressive with his reviews as my Mom, he was surely not at a loss for compliments when it came to these breakfast beauties. If they pass the Daddy deliciousness test, they will definitely have a permanent home in my recipe files.

One of my favorite features of a Cook’s Illustrated recipe, is the inclusion of a detailed history describing how it was conceived. In the process of constructing the “Best” blueberry muffin, CI tested a variety of ways to achieve maximum intensity of sweet-tart fruity flavor. Ulimately, they landed on a technique that I think is absolutely brilliant: to pump up the volume, why not take some of the berries, cook them down on the stovetop to evaporate excess juices, thus concentrating their flavor, and swirl the resulting mixture right into the muffin batter? As it turns out, this thick, potent, deep-indigo jam, swirled in along with a substantial amount of fresh fruit, gave the muffins a distinctive one-two berry punch- exactly what they needed to put them over-the-top.

But what about the muffin base- after all, that was the problem I was dealing with in the first place… what did Cook’s do to ensure I didn’t fall into the same trap I had with Melissa’s? Well, those clever folks at CI had a few tricks up their sleeves (and some interesting science to back them up)! First off, they examined the mixing method: the creaming method was out after producing muffins that were too cake-like, and unable to support the hefty amount of fruit added to the batter. A more suitable choice, was the quick-bread or “muffin method” (haha! big surprise there!) that calls for mixing the wet and the dry ingredients separately, and then gently folding them together. They stressed the importance of not over-mixing (as with pancake batter), because “overly strenuous mixing encourages the proteins in flour to cross-link and form gluten, toughening the final product.” This method proved superior, and made for muffins with a hearty crumb, substantial enough to support the generous addition of berries. Next, to achieve ultimate moisture, they considered the fat used in the recipe. The balance of butter (which contributes great flavor) and oil (more effective at making baked goods moist and tender) was the key. Apparently, “unlike butter, oil contains no water, and is able to completely coat flour proteins and prevent them from absorbing liquid to develop gluten.” Equal amounts of both fats ended up producing just the right combo of buttery flavor, and moist, tender texture. Finally, to make the muffins as rich as possible, they sought a substitute for whole milk. Buttermilk offered a slight tang (complementing the berries) and appealing richness, while still being light enough “to keep the muffins from turning into heavyweights.” And do we want heavyweights, my friends? I think not! In my eyes, they successfully deduced a winning recipe for not only blueberry muffins, but “fill-in-the-blank” muffins, that would be delicious with any selection of mix-ins. No more futzing with Melissa’s metzah-metzah muffins (that means so-so for all you non Yiddush speakers out there). These babies are where it’s at!
Thank you Chaya for hosting this week- and again, please let me apologize for taking such extreme creative liberties with the recipe. I also wanted to extend a very warm welcome your way- SMS is lucky to have you and I’m looking forward to baking together each week! To check out all the other SMSter’s muffins, swing by our blogroll– can’t wait to hear from all you lovely ladies!

Before I forget, I was hoping to pick all your baker’s brains and get some feedback/suggestions regarding a recipe that’s coming up in 2 weeks: the Coconut Custard Pie. I’d really love to use the mini (4″) tart pans I just got my hands on (they’ve been on my wish list forever), instead of a single 9″ pie plate. I get all worked up and nervous about adjusting baking times and determining when things are done, and I wasn’t sure if they’d take significantly less time in the oven for the crust to brown/custard to set (the baking time as written is 50-55 min). Are there any tell tale signs a custard pie is done? Do you want a little jiggle in the middle or no movement at all? Any advice or ideas? I’d really appreciate your help, as I (of course) want the sweet treat I make special for my Mom to be delicious (and perfectly baked)! If I can’t figure it out, I’ll just make the full pie. Has anyone tried this recipe yet? Thanks in advance for your assistance! 🙂

BEST BLUEBERRY MUFFINS
adapted from Cook’s Illustrated (May/June 2009)

MAKES 12 MUFFINS

Ingredients:

2 cups (about 10 ounces) fresh blueberries, picked over
1 1/8 cups (8 ounces) plus 1 teaspoon sugar
2 1/2 cups (12½ ounces) unbleached all-purpose flour
2 1/2 teaspoons baking powder
1 teaspoon table salt
2 large eggs
4 tablespoons (½ stick) unsalted butter, melted and cooled slightly
¼ cup vegetable oil
1 cup buttermilk (see note)
1½ teaspoons vanilla extract
**2 teaspoons grated orange zest

Note: If buttermilk is unavailable, substitute 3/4 cup plain whole-milk or low-fat yogurt thinned with 1/4 cup milk. (*You can also use 1 cup of milk mixed with 1 tablespoon lemon juice or vinegar- let it sit for 10 minutes, and then it’s ready to use!)

Directions:

1. FOR THE MUFFINS: Adjust oven rack to upper-middle position and heat oven to 425 degrees. Spray standard muffin tin with nonstick cooking spray. Bring 1 cup blueberries and 1 teaspoon sugar to simmer in small saucepan over medium heat. Cook, mashing berries with spoon several times and stirring frequently, until berries have broken down and mixture is thickened and reduced to ¼ cup, about 6 minutes. Transfer to small bowl and cool to room temperature, 10 to 15 minutes.

2. Whisk flour, baking powder, and salt together in large bowl. Whisk remaining 11/8 cups sugar and eggs together in medium bowl until thick and homogeneous, about 45 seconds. Slowly whisk in butter and oil until combined. Whisk in buttermilk, vanilla, **and orange zest until combined. Using rubber spatula, fold egg mixture and remaining cup blueberries into flour mixture until just moistened. (Batter will be very lumpy with a few spots of dry flour; do not overmix.)

3. Use an ice cream scoop or large spoon to divide batter equally among prepared muffin cups (CI suggests that the “batter should completely fill cups and mound slightly,” however, that left me with a little overflow problem, i.e. merging muffin tops. I was worried that my muffins would be unattractive, but once split apart, they really looked fine. Next time though, I’ll only fill the cups 3/4 of the way, and make a few extra!). Spoon a teaspoon of cooked berry mixture into center of each mound of batter (I stuck my spoon down in a ways just to be sure the blueberry mixture went through and through). Using a chopstick or skewer, gently swirl berry filling into batter using a figure-eight motion. (If using: Sprinkle pecan crumble- recipe below- generously and evenly over muffins).

4. Bake until muffin tops are golden and just firm, 17 to 19 minutes, rotating muffin tin from front to back halfway through baking time. (My gigantic muffins took significantly longer to pass the toothpick test, at least an additional 3-4 minutes, but if they were normal size, the baking time given would probably be accurate). Cool muffins in muffin tin for 5 minutes, then transfer to a wire rack and cool 5 minutes before serving.

BEST BLUEBERRY MUFFINS WITH FROZEN BLUEBERRIES

Note: Our preferred brands of frozen blueberries are Wyman’s and Cascadian Farm.
Follow recipe for Best Blueberry Muffins, substituting 2 cups frozen berries for fresh. Cook 1 cup berries as directed in step 1. Rinse remaining cup berries under cold water and dry well. In step 2, toss dried berries in flour mixture before adding egg mixture. Proceed with recipe from step 3 as directed.

STEP-BY-STEP MAKING MUFFINS WITH BLUEBERRY FLAVOR THROUGH AND THROUGH

1. MAKE BERRY JAM

Cook half of fresh blueberries into thick jam to concentrate their flavor and eliminate excess moisture.

2. ADD FRESH BERRIES

Stir 1 cup of fresh blueberries into batter to provide juicy bursts in every bite.

3. PORTION BATTER

Scoop batter into muffin pans, completely filling cups. (Or almost filling cups!)

4. ADD JAM TO BATTER

Place 1 teaspoon of cooled berry jam in center of each batter-filled cup, pushing it below surface.

5. SWIRL INTO BATTER

Using chopstick or skewer, swirl jam to spread berry flavor throughout.

Pecan Crumble
slightly adapted from The Sweet Melissa Baking Book by Melissa Clark

Makes enough for two batches of muffins (Either cut the recipe in half or use the extra in a baked fruit crumble!) I wonder if you can freeze the leftover- thoughts anyone?

I’d advise you prepare this first, and have it ready to go when your muffins are portioned.

Ingredients:

• 3/4 Cup pecan pieces
• 3/4 Cup plus 2 tablespoons all-purpose flour
• 3/4 Cup firmly packed light brown sugar
• 3/4 Teaspoon salt
• Pinch freshly grated nutmeg
• 1/8 Teaspoon ground allspice
*I also added 1/8 Teaspoon cinnamon (just because I love it so!)
• 8 Tablespoons (1 stick) unsalted butter, melted and cooled slightly

Directions:

1. In a large bowl, stir together the pecans, flour, brown sugar, salt, nutmeg, allspice, *and cinnamon. Stir in the melted butter.

The Cake Slice: Cinnamon Pecan Coffee Cake

Cinnamon Pecan Coffee Cake 1

When I began working on “Hot Oven, Warm Heart” a few months back, I was absolutely blown away by the warm welcome and positive feedback I received from the baking and blogging community. As I embarked upon this new endeavor, I was hoping to pursue my passion, expand my skills, and chronicle my culinary adventures, but more importantly, I wanted to form meaningful connections with other people along the way. After joining the Sweet Melissa Sundays group, and getting to know many of the amazing members- all talented bakers with shining spirits, open minds, and kind hearts, I realized I had stumbled upon a rare opportunity to become a part of something truly special. United through a shared experience, the many miles that separate us seem to fade away as we all sit down at one huge virtual kitchen table to enjoy the same slice of freshly baked cake, bite of warm, gooey cookie, or forkful of rich, crusty pie. With each supportive comment, piece of advice, or word of encouragement, new friendships are fostered and the close-knit online family that has formed grows stronger. I am no longer alone when tackling my latest recipe- rather, I have a team of lovely ladies, scattered all over the world, who are always cheering me on, whisking, beating, stirring, kneading, and mixing right alongside.

IMG_7177

I am delighted that today marks the start to a new chapter in my blogging career, as one of the most recent additions to another fabulous online baking group called The Cake Slice Bakers. For the last year, they baked their way through arguably the most innovative book on the market featuring layer cakes, Sky High: Irresistible Triple Layer Cakes by Alisa Huntsman. It was through reading many of their posts that I was persuaded to purchase a copy of my own, and I have since utilized it time and again with phenomenal results for all my celebration cake baking needs. When I read that the group would be moving on to a second cookbook, and temporarily accepting more members, I jumped at the chance to join, eager to take the next step on this inspiring journey, and meet a whole new batch of baking bloggers. Each month we will be trying a different recipe from Southern Cakes: Sweet and Irresistible Recipes for Everyday Celebrations by Nancie McDermott, featuring 65 charming, down-home, sinfully delicious recipes that reflect a region steeped in rich culinary tradition. As a Boston girl born-and-raised, I’m anxious to discover some exceptionally unique cakes that reflect this Southern heritage, and have been passed down from generation to generation. The recipes cover a wide range of cake styles, everything from Bourbon Pound Cake, Lady Baltimore Cake, Lemon-Filled Coconut Cake, and Tomato Soup Cake to Charleston Huguenot Torte, Red Velvet Cake, Blackberry Jam Cake with Caramel Glaze, Chocolate Mayonnaise Cake with Divinity Icing, and Mississippi Mud Cake. We’re kicking things off with a winner, an out-of-this-world Cinnamon Pecan Coffee Cake, and if this choice is any indication, The Cake Slice Bakers have succeeded yet again in their book selection, unearthing an impressive literary gem that just might have found a permanent home on my cookbook shelves.

IMG_7226

Coffee cakes first appeared on the table in seventeenth century Europe, where the earliest versions consumed alongside a cup of coffee were more akin to the sweet yeast breads popular at that time. Recipes for the tasty pastry came to America along with German, Scandinavian, and Dutch immigrants, and during colonial times, the German and Holland communities in New York, Delaware, and New Jersey were famed for their delicious variations. By the late 1800’s, coffee cake recipes evolved, and those being published in cookbooks for everyday American homemakers more closely resembled the cake-like sort we’re used to today. Coffee cakes are instantly recognizable and distinguished by the inclusion of streusel, (a German word meaning “something scattered or sprinkled”). This classic filling and/or topping is a deliciously simple mixture of sugar, flour, butter, spices, and oftentimes nuts, that is usually layered between a sour-cream cake batter and baked into a superb treat- the perfect accompaniment to a cup o’ joe.

IMG_7250

The Cinnamon Pecan Coffee Cake from Southern Cakes is a fabulous representation of the old-timey dessert. Supremely moist with a delicate, tender crumb, it is bursting with flavor and contrasting textures thanks to the crunchy nuts and juicy raisins in the generous streusel. While assembling the cake, I was worried that the proportion of batter to cinnamon sugar mixture was off, fearing filling domination. I was pleasantly surprised to be proven wrong, and found the finished product was well balanced, even with a substantial center swirl, and plenty of sweet crusty topping. Exceeding my expectations, it’s a real crowd-pleaser that would be appropriate not only to serve as a casual complement to morning coffee, but also as an impressive and elegant dessert for a more formal occasion.

IMG_7247

Although I’m confident I will be baking it again in the future, my only grievance with this yummy cake is due to the extensive preparation. I dirtied many a bowl while assembling the different elements, and temporarily turned my kitchen counter into a (well-organized) mess. With a few other coffee cakes under my belt, I felt that this one was a bit fussy by comparison, especially when it came to distributing the rather thick batter on top of the filling. It was not feasible to simply spoon on a mound of batter and spread it evenly with a spatula without pulling up the carefully scattered mixture, and eliminating the possibility of maintaining defined layers. To circumvent this issue, I used a teaspoon to place small dollops of batter close together all over the filling, and then carefully smoothed them out with the back of my spoon, taking care to bring batter all the way to the edge of the pan. It took some extra time and patience, but in the end it paid off, and I was quite pleased with the finished cake’s visual appeal. I also utilized two of my favorite tricks when prepping ingredients- plumping the raisins in boiling water (with a touch of vanilla for flavor) so that they would remain moist during baking, and toasting the pecans. Even if it’s not indicated in the recipe I always toast my nuts, which does wonders to bring out their intense, robust flavor. Of course, these are small touches, but sometimes it’s the little things that elevate a baked good from ordinary to extraordinary, and allow it to realize its full potential.

IMG_7283

If you’d like to give this memorable coffee cake a try, here’s a link to a printable recipe. I can’t wait to experiment with more of the delectable delicacies found in Southern Cakes, and I’m so happy to be exploring this book with The Cake Slice Bakers. A big thank you goes out to the other members who permitted my admission into the group- I’m really looking forward to getting to know all of you! Isn’t it wonderful that cake has the power to bring people together?

IMG_7286

Joy Heart 2

SMS: Sticky Buns with Toasted Almonds and a bonus bun throwdown!

Sticky Buns with Toasted Almonds 6

Dear my beloved yeast breads,
I must offer my sincerest apologies that your first appearance on Hot Oven, Warm Heart is devastatingly belated. I simply cannot believe that you have not yet been featured in all your glory- but you have not been forgotten, and can no longer be ignored. Let me assure you, however, you are now, and always will be my very favorite baked good to create in the kitchen. The feel of your soft, supple dough giving way as my hands lovingly knead you into submission, the smell of fermentation wafting through the air, the sight of your magic in action as you climb up the sides of my Grandma’s big yellow bowl, reaching the top and peaking over to say “hello Joy, I’m ready, let’s go!”- these are just a few of the reasons I am captivated by your enchanting disposition. Ever since that first loaf of cinnamon raisin swirl bread, I knew you were special and would forever hold a place in my heart, along with top honors in my baking repertoire. Please forgive me for my indiscretion, and allow me to introduce you in one of your most irresistible forms, the sticky bun.
Love,
Joy

IMG_8419

The origin of the sticky sweet, large-size caramelized cinnamon roll popularized in North America and aptly called the sticky bun, was clearly influenced by British, Dutch, and Germanic cookery and baking. Before the sticky bun came two central predecessors, the Brit’s Chelsea bun and the German’s Schnecken. First created in an eighteenth century Bun House in Chelsea, Great Britain, the Chelsea bun is made of a rich yeast dough flavored with citrus zest and cinnamon or a spice mixture. The dough is spread with brown sugar, butter, and currants, rolled into a spiral shape, sliced into individual buns, given a sweet glaze covering, and baked. On the other hand, Schnecken, which means “snail” in German, are also yeast-raised sweet rolls, whose dough is spread with sugar, nuts, spices, and raisins, rolled, sliced, and baked in muffin tins with either honey or sugar and butter in the bottom, creating a glaze. The appearance of Schnecken in America can be traced back as early as the 1680’s, when they became popular among bakers in Germantown, Pennsylvania, a Philadelphia suburb. As more German immigrants settled in Pennsylvania Dutch Country in the 18th Century, Schnecken became a signature pastry of the area, which it remains today. The sticky bun combines the size and make-up of the Chelsea bun with the fillings and coatings of Schnecken, taking the best elements of both pastries and transforming them into a truly irresistible treat, steeped in cultural history.

IMG_8421

As one of my favorite yeast breads to make, sticky buns make a regular appearance in my kitchen. Though the multi-step process sometimes seems daunting and time consuming, they are a great do-ahead recipe, and a fantastic crowd-pleasing sweet that you can assemble the day before serving. Just recently, I baked a batch to serve with morning coffee when entertaining one of my closest friends (who shall remain nameless)- by the end of our get-together, she managed to devour three, and I realized that a tray of hot, fresh buns just out of the oven and still oozing cinnamon-y goodness was potentially dangerous to leave in the center of the table! A great sticky bun can be a real show-stopper- if they’re too yummy to stop at one, then I know I have a winner on my hands.

IMG_8454

Coincidentally, not two days after breaking out my go-to recipe, I checked the SMS site only to find that my next assignment, as chosen by Jen of Not Microwave Safe, was Melissa Murphy’s Sticky Buns with Toasted Almonds. At first glance, I considered passing, but then I recognized the opportunity I had on my hands. What a perfect chance for a sticky bun throwdown! By tasting the two recipes side-by-side, it would be much easier to discern the subtle nuances differentiating the buns, and hopefully, with the help of my tasting panel (a.k.a family), I could select the preeminent favorite. Would the new bun on the block surpass my old standby in taste, texture, appearance, and originality? I simply had to find out. Needless to say I’ve had quite a few buns in my oven this past week, but after much kneading, proofing, punching, rolling, sprinkling, slicing, baking, and glazing, I’m happy to report a winner has been determined. Before I announce the award for my #1 bun, let’s take a closer look at the competitors.

In this corner, Melissa Murphy’s Sticky Buns with Toasted Almonds.

IMG_8426

In fairness to the competition, I decided to follow the recipe to the letter, making no changes or substitutions. While the dough itself came together quickly and was easy to handle, I felt it was a little stingy for a batch of twelve buns. By the time it was rolled out to the size rectangle indicated in the directions, it was quite thin, and I almost had problems with tearing and leaking (luckily I solved the issue with some crafty bun cutting). But it was the filling itself that I found flawed. Divergent from the melted butter/brown sugar combination that I’m used to, Melissa’s recipe calls for an egg wash and granulated sugar. After applying the wash, my dough was, well, wet, making it difficult and messy to roll up. I was displeased with the visual appeal of my buns when first shaped and placed in the pan, but I remained hopeful that after they rose, baked, were doused in sticky glaze and covered with lots of toasted almonds, the final product would not reveal the many imperfections. (Thankfully this theory proved accurate). My finished buns were lovely- lofty, delicate, moist, and well coated in a deep, dark, viscous glaze. Most striking, however, was the lack of flavor cohesion. Instead of coming together harmoniously, the ingredients were highly discernable- the strong tastes of orange zest (in the dough) and maple syrup (in the glaze) almost overpowered the bun itself, detracting from the overall eating experience. But truthfully, all criticisms aside, the buns received high praise from all who tasted them, and if there were no competition or comparison, they would certainly be considered a delicious treat, and just plain finger-lickin’ good.

IMG_8436

And in this corner, may I present to you the Cook’s Illustrated Overnight Sticky Buns.

Overnight Cinnamon Sticky Buns with Toasted Pecans 3

Now I must admit, I may have been a bit biased because this recipe has never failed me- consistently producing some “knock-your-socks-off,” crave-worthy, can’t-leave-the-table-without-eating-three-of-‘em sticky buns.

IMG_6737

The dough is more substantial than Melissa’s, and is also much richer with added eggs and butter, imparting tremendous tenderness and a soft, supple texture. It is an absolute dream to handle and roll out, slices beautifully (with the help of a serrated knife and a spray or two of Pam) and rises into perfectly spiraled, nice and neat puffy little clouds of dough.

IMG_6746

Though you must wait patiently during the buns’ short stay in the oven, you’re rewarded with the tantalizing and intoxicating aroma of warming spices that permeates the entire home. A dozen buns emerge in less than half an hour, beautifully golden brown and somehow utterly inviting.

IMG_6759

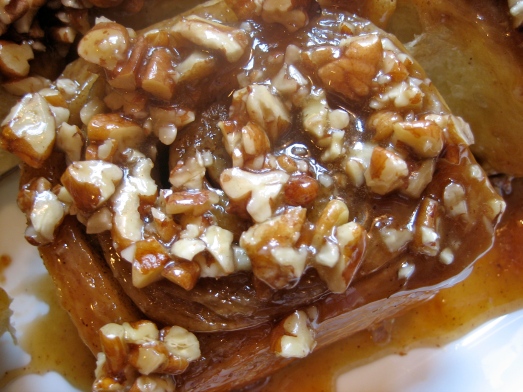
The cinnamon brown sugar filling adds great depth of flavor, really driving home the taste of caramel. But what truly sets these special buns apart and makes them unforgettable is the double ooey gooey glaze. Yes, these outstanding buns not only receive the traditional bottom of the pan glazing treatment, they are also topped with yet another glaze that is mixed with the toasted pecans and generously spooned over each individual turned out bun as it cools. I am convinced it is this brilliant double-glazing technique that delivers the ultimate sticky bun experience in each and every bite, and as far as I can tell, no other bun in the land holds a candle to this champion.

IMG_6875

So, I’m sure many of you are currently suffering from sticky bun overload (if there is such a thing), but I highly recommend that you bookmark this particular version, and place it in your must-try files, maybe to make an appearance on National Sticky Bun Day- February 21st. Now, I’m confident that I represent the dissenting opinion on Melissa’s buns since they were truly quite tasty, but in the end, they just did not have enough of a “wow factor” to de-thrown my longstanding favorite. They still receive two thumbs up from this bun baker, and I wouldn’t hesitate to give them my seal of approval.

IMG_6750

A big thanks goes out to Jen of Not Microwave Safe for her terrific selection, and affording me the opportunity to orchestrate my very own throwdown. It was so much fun baking back-to-back batches of buns, and evaluating the pros and cons of each. I can’t wait to explore the other SMS bakettes’ blogs to check out all the creative ways everyone played with the recipe. I just have to note that although I tried to prepare my buns exactly as directed, I couldn’t help but make a few very minor alterations. Instead of topping my buns with chopped whole almonds, I elected to toast up some sliced almonds, simply for aesthetic appeal. More importantly, in order to avoid dry, hard, over-browned buns, I had to pull mine out of the oven much earlier than the instructed 45 minutes- they were fully baked between 25-30 minutes, so if you decide to give the recipe a go, please start checking early! My other recipe offered a great tip to test the buns for doneness- insert an instant read thermometer into the center of a bun, and if it’s reached 180°, they are finished baking. Finally, instead of removing each bun from the pan individually with tongs (which I feared would squish them), I turned them all out at once by flipping the pan over directly onto my serving platter. Just a few notes that I hope help you along the way!

I encourage you to head into the kitchen to whip up your own batch of sticky buns- you will not be disappointed! And if you’re a nervous yeast bread virgin with any questions or concerns, I’d be happy to offer my assistance- just leave a comment and ask away!

IMG_6863

Joy Heart 2

SMS: Orange Scented Scones *with Grand Marnier Honey Butter Glaze*

Orange Scented Scones

My second favorite way to relax and unwind (after baking, of course) is curling up in a cozy spot, wrapped in a fluffy blanket, sipping on a piping hot mug of French vanilla tea. When the kettle whistle blows, the tension in my body immediately begins to ease, as I eagerly await the curative brew with which I start and end each day. While I don’t have an ounce of British heritage, I swear I belong in the UK, where “tea breaks” are practically a national pastime. There is something magically restorative about enjoying a good cup of tea, and I highly recommend incorporating the soothing beverage in your repertoire, especially as an accompaniment to any indulgent sweet treat starring as your breakfast, snack, or dessert. There is no culinary couple that can quell an anytime craving quite like tea and scones- the ultimate European gastronomic duo. Like peanut butter and jelly or milk and cookies, tea and scones simply belong together, flawlessly complimenting each other’s best attributes. Both tea and scones have quite a bit of ground to cover to surpass coffee and muffins in regard here in the US, but thanks to recipes like this week’s SMS selection, tasters are being converted with just one bite.

IMG_8023

A small quickbread (or cake if the recipe includes sugar) of possible Scottish origin, the scone is a popular treat in many countries around the world, but especially in the UK, Australia, New Zealand, Ireland, Canada and of course, the US. They are usually made of wheat, barley or oatmeal, with baking powder acting as the leavening agent. The name is said to derive from the Middle Dutch schoonbrood, schoon meaning “pure and clean” and brood meaning bread. The original scone was a round and flat cake (now commonly referred to as a bannock), that was usually the size of a small plate, made with unleavened oats, and baked on a griddle. It was then cut into triangle-like quadrants, or scones, for serving. The scone evolved into the oven-baked, well-leavened pastry we know today when baking powder was introduced to the market and became widely available to the masses. While the British scone is often lightly sweetened, it can also be savory, and popular mix-ins include raisins, currants, cheese or dates. In contrast, scones in the US are typically drier, larger and sweeter, and are standard coffee shop fare, featuring fillings such as cranberries, blueberries, nuts, or even chocolate chips.

IMG_7978

There are a few keys to producing an excellent scone, and ways to avoid the dreaded “hockey puck” consistency that gives scones a bad name. Both temperature of ingredients and mixing method are crucial components to consider. It is best if all the ingredients are cold, to add the liquid to the dry ingredients all at once, and then to mix everything together quickly and lightly. Because the butter is “cut-in” to the dry ingredients (just like in making pie dough), it is crucial that it’s cold, so it becomes small, flour-coated crumbs rather than melting and forming a smooth mass- this step is what ultimately gives scones their characteristic delicate, flakey texture. After the liquids are added, it is imperative to mix the ingredients as little as possible (only until everything comes together)- an overworked scone is usually hard and doughy, so a light hand is essential. When the dough is turned out and formed into a disc, it can either be cut into triangles, or rounds by using a cookie cutter. If you opt for the latter method, it is recommended to twist the cutter through the dough instead of pushing straight down, which yields higher rising scones during baking. Brushing the scones with an egg wash or some additional milk/cream imparts a gorgeous golden color and helps encourage browning. When they’re removed from the oven, you can either allow them to cool uncovered for a crusty exterior or wrap them (still hot) in a clean towel for a softer outer layer. Scones are best served warm and eaten the same day they’re made. Classic accompaniments include butter, jam or preserves, clotted cream, and/or lemon curd, however, a well-made scone is delicious even when plain. If you keep these tips in mind, scone baking is relatively easy, and you’re guaranteed to produce a winning treat.

IMG_8003

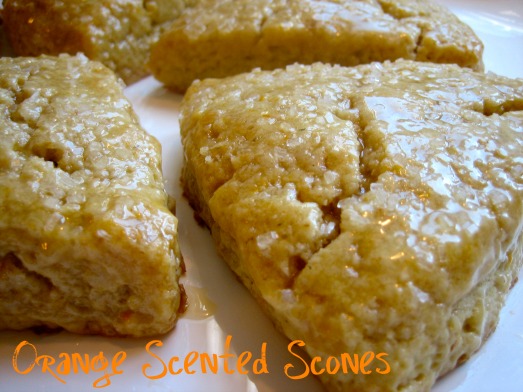
This is especially true when you have a sure-fire recipe to fall back on, like the Orange Scented Scones from The Sweet Melissa Baking Book. When I first read the recipe, chosen by Robin of Lady Craddock’s Bakery, it seemed like a very basic cream scone dressed up with a bit of grated orange zest. I wanted my scones to deliver a punch of orange flavor, so I pumped up the citrus volume in a few places. I added the zest of one whole orange (which was a bit more than the specified two teaspoons) and then turned to my pantry, which is stocked with a variety of flavored extracts, including orange. I mixed a teaspoon of orange extract into the wet ingredients for that extra hint of citrus essence all throughout the dough. But I didn’t stop there! I knew I wanted to accent my scones with some sort of glaze, and while my first thought was to go the confectioners sugar/orange juice route, I stopped short in my tracks when I discovered a honey butter scone glaze recipe featured in one of my favorite cookbooks, A Passion for Baking, by Marcy Goldman. In an “A-ha!-in-the-kitchen” moment, I thought, why not add a splash of that Grand Marnier (or orange liquor) I have leftover from the Fallen Chocolate Soufflé Cake? Perfect! With triple the orange zip, the scones were tangy, bright, and super refreshing. The sticky sweet glaze kept them ultra moist on days 2 and 3 (I can’t report on any longer since they didn’t last more than that!) I’m confident the classic scone recipe would be a great canvas for any flavor profile you’re craving, and by changing up the mix-ins with different fruits, spices, nuts, and zests, you never have to make the same scone twice! I highly recommend giving the glaze recipe a try as well (either spiked with your favorite liquor or booze free)- dry, chalky stones… I mean, scones, be gone!

IMG_8000

Thank you to Robin of Lady Craddock’s Bakery for this excellent tea-time pick! Head on over to her site for the recipe, and have fun playing with it and making it your own. Get some other great ideas by checking out all the delicious scones baked up by the other lovely ladies of SMS!

IMG_7996

Just in case you’d like to test my version, here’s the fabulous (and truly simple) glaze recipe I used:

Scone Glaze
from A Passion For Baking by Marcy Goldman

Ingredients:

1/3 cup honey
¼ cup or 4 tablespoons unsalted butter
1 tablespoon flavored liquor such as Grand Marnier (optional)
1-2 tablespoons sparkling or sanding sugar to coat

Directions:

While the scones are baking, heat honey and butter in a liquid measuring cup in the microwave until mixture is just simmering, about 1 minute, stirring halfway through. Let cool slightly, and then stir in the liquor if using.

Brush the scones lightly with honey-butter glaze as they come out of the oven. Let stand on baking sheets. Repeat with more honey-butter glaze, more generously, about 15 minutes later. Sprinkle with the sanding sugar and let set.

Joy Heart 2

SMS: Fresh Peach Muffins

Fresh Peach Muffins 2

*Just wanted to apologize that this post is a little late- as some of you know, I’ve been under the weather for the past few weeks, and unfortunately, I really wasn’t feeling well yesterday. I hope you understand!*

You may have guessed from my SMS selection last week, that I have a fondness for quick breads. My only criticism is that while they may be “quick” to prepare, the long bake time of an hour or more often means waiting (rather impatiently, I must admit) to sit down with a slice of delicious loaf. But the option to make individual serving sizes in the form of muffins can save the day when you’re craving a sweet breakfast treat that can be on the table in less than half the time! Whether you’re a self proclaimed muffin top lover like myself, preferring to indulge in the soft textured, yet slightly crispy and caramelized exterior of the mushroomed muffin dome, or you favor the rougher, tight crumb of the bottom portion, often dubbed the “muffin stump,” most would agree that a muffin is the ideal breakfast pastry. With endless combinations of possible mix-ins and featured ingredients, the modern American muffin has a variation to please every palate, from blueberry to chocolate chip, pumpkin to date nut, lemon poppyseed to banana crumb, and bran to corn- there are plenty of styles to choose from and it can be difficult narrowing down a favorite. As summer comes to a close, I’m tempted to incorporate the bounty of readily-available ripe, juicy fruits in my baked goods as often as possible while they are still in season. Thanks to JoVonn of The Givens Chronicles, this week’s SMS recipe, Fresh Peach Muffins, offered the perfect opportunity to try a muffin flavor I’ve never made before, and highlight the bright luscious stone-fruit one last time before Fall sets in.

Fresh Peach Muffins 4

The word “muffin” was possibly derived from the Old French moufflet, which referred to “soft bread,” or the German muffen, meaning “small cake.” The earliest versions tended to be less sweet and much less varied in ingredients than their contemporary form. Pulled together quickly and easily, muffins were usually served as a breakfast food, but because they also grew stale rapidly, they were not a highly marketable baked good and remained mostly in home kitchens until the mid-20th century. Fannie Merritt Farmer included 15 recipes for muffins in her Boston Cooking-School Cook Book of 1896, however most were limited to a few different grains and some readily available additives like raisins, apples, berries, and nuts. So how did the modestly simple mini cake transform into the elaborate super-sized version we’re accustomed to today?

Fresh Peach Muffins 5

The 1950’s saw the introduction of muffin mixes to the market, but it was a combination of circumstances in the ‘70’s and ‘80’s that resulted in major changes to the breakfast baked good. The decline in home-baking, the health food movement, the rise of the specialty food shop, and the gourmet coffee trend all contributed to the evolution of the modern day muffin. “Healthful” muffin recipes using whole grains, yogurt and various vegetables became prolific, but in order for these muffins to maintain any shelf-life without artificial preservatives, both the sugar and fat content needed to be increased, making these treats more comparable to their cupcake counterparts. (The higher sugar and fat content act as tenderizers, and minimize gluten development, producing a richer cake-like muffin with a softer crumb.) With the emergence of gourmet coffee houses, there was a need for gourmet snacks to serve as accompaniments, and fancier recipes were created which departed from the humble originals. Thanks to the marketing trend toward larger portion sizes, muffins ballooned to the soft-ball size jumbos now abundantly available, and new pans were created for the home cook to replicate the extra large versions lining every coffee shop pastry case.

Fresh Peach Muffins 9

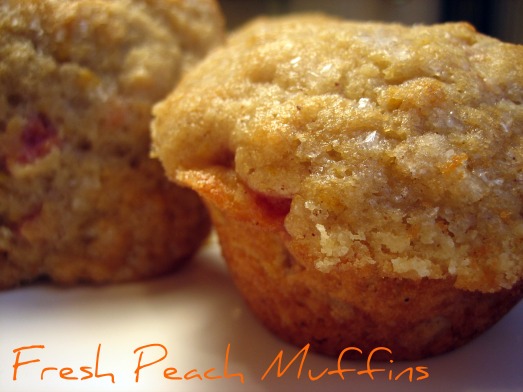
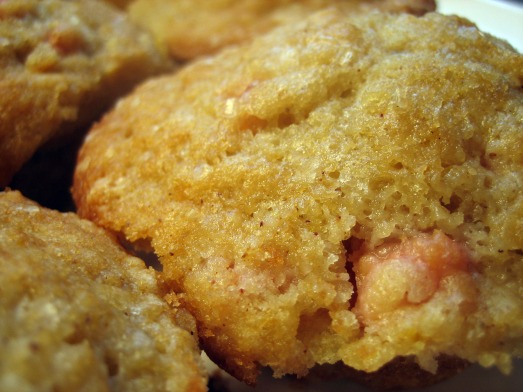
What makes Melissa Murphy’s basic sweet muffin recipe special is its flexibility- it can be dressed up with the addition of different citrus zests, spices, and fruits to suit your taste or accommodate ingredients on hand. In this variation, peaches play a starring role with accents of orange zest and cinnamon. While the flavors are subtle and mellow, they coordinate and complement each other nicely. These muffins are nicely moist, with a large open crumb. While hefty and substantial, they are surprisingly fluffy, though they lack a certain softness and delicacy I prefer in my quick breads. My only modifications to the recipe were to add a teaspoon of vanilla and a heaping cup of peaches to the batter- I think they could use even more fruit, as the peach to muffin ratio needs improvement. I also added sanding sugar to the tops, giving the muffins a certain sparkle and sweet crunch to every bite. Though this will not replace my favorite muffin recipe, it is a solid addition to my baking repertoire because of its adaptability.

Fresh Peach Muffins 7

I have to send out a double thank you to JoVonn of The Givens Chronicles– first, for this week’s SMS pick- please visit her lovely site to find the recipe, and check out the multitudes of muffins whipped up by the other bakers on our blogroll! Second, I’m so excited to have JoVonn join me for this round of Operation Baking GALS as a member of Team Oven Loving for the Recovering. It is so kind of her to dedicate time and energy as a volunteer baker, and I know the soldiers will truly appreciate her contribution. If you’re interested in getting involved, there’s still time to sign up- please don’t hesitate to get in touch for more information! 🙂

Joy Heart 2